When I was first learning how to use 3D printers, I had many questions. One of these was “Can you over cure UV resin?”
I did some research into this issue, and I found that it is possible to over-cure UV resin. This can happen when you leave items in the curing room for too long or if you expose them to a lot of sunlight before they have fully cured.
Over-curing UV resin, such as SLA resin, is actually a common mistake, even amongst experienced makers.
Thankfully, it is relatively easy to avoid over-curing UV resin items as long as you follow the correct curing procedures. Read on to learn more.
The Proper Way to Cure UV Resin
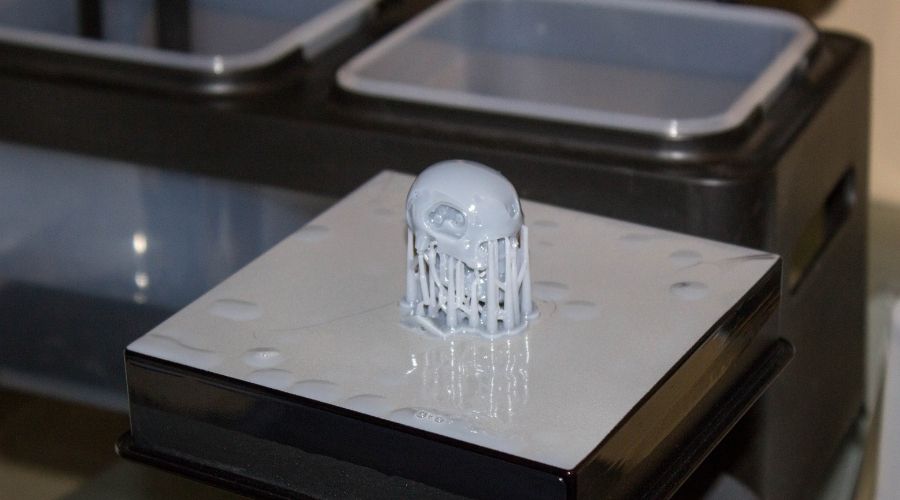
Resin begins curing during the printing process. Many 3D printers include a UV light to harden the resin once it has been extruded. This is necessary to give the object a coherent shape.
Without this initial curing, your object would be a gooey mess. It would be impossible for your printer to apply one layer of resin on top of another during the printing process. This is because the layer underneath would collapse under the weight of the next layer.
The majority of the curing process of UV resin takes place after printing. While the object will have a well-defined shape at this point, it will be too soft to avoid deformation. It needs to be fully cured by the application of UV light.
There are two ways to do this: shine an artificial UV light on the object and leave the object out in the sun. See below for more information on each process.
Curing Resin With Sunlight
If you do not have a UV light, you may want to try curing your resin with sunlight. It is easier to use a UV light, and using an artificial light source often offers better results. However, it is still possible to get good results when curing UV resin using natural sunlight.
If you plan on curing UV resin with sunlight, you should check the weather forecast before printing. If the forecast states that the day will be cloudy, it is best not to print an object that day.
Not only will your object not receive enough UV light, but it will also be cured unevenly. You want to cure UV resin on a clear and sunny day.
When curing UV resin with sunlight, keep in mind that the process will take two to three hours. You should place the object in a location that will receive uninterrupted sunlight for the duration.
Rotate the Object
You will also need to turn the object every 45 minutes or so to ensure that it cures evenly.
If you don’t want to do this, you can use small handheld mirrors to ensure an even distribution of UV light over the object.
Place the Object in Water
If you must cure UV resin in the sun, I recommend placing the object in a clear plastic container filled with water.
The water will diffuse the sun’s rays, which will result in an even distribution of UV light. Also, curing UV resin in water is quicker than simply leaving the object out in the sun.
Additionally, the oxygen in air can cause the resin to dry out. Putting the object in water will reduce the amount of oxygen that reaches the resin.
Don’t Overdo It
Finally, too much direct sunlight can even over-cure the resin. This will cause it to become brittle and crack. Using a water bath will prevent this from happening.
Keep in mind that the container must be open. Also, the sides of the container will block some UV light. You will still have to turn the container several times to avoid a slightly uneven distribution of UV rays.
Be sure to check on your object regularly, as the unpredictable nature of UV rays from sunlight could result in curing times that are faster or slower than you predict.
Curing Resin With a UV Light
It is easier and more commonplace to cure UV resin using a UV light. Professional makers usually use a heated UV curing chamber, as this offers the quickest and most consistent results.
However, it is certainly possible to get good results without using an expensive curing chamber. Many hobbyists, myself included, use a UV light that is intended for nail salons. These lights are effective and affordable.
It is also possible for hobbyists to build their own UV curing chambers.
However, this still requires a high level of technical knowledge. It is easier to use an off-the-rack UV light unless you feel confident in your tech knowledge.
It should only take a few minutes to fully cure resin using a UV light. If you are curing a small object, it may only take a minute or so. Larger and thicker objects will take around five minutes.
Due to the relatively short curing times, it is easy to over-cure resin when using a UV light.
If you are curing a small object that will only take a minute or so, it is best to simply stay in the room and keep track of time on your phone or watch. Even leaving a small object under UV light for an extra minute can result in over-curing.
This will cause the resin to become brittle and weak. If you are curing a large object that takes five minutes or more, you can set a timer and go do something else.
However, you should not let the object cure for more than a few seconds over the five-minute mark.
Is Isopropyl Alcohol a Curing Agent?
Isopropyl alcohol is an important part of the curing process. However, many novice makers do not understand exactly how it works. Isopropyl alcohol does not actually cure the resin itself. Instead, it helps to remove excess uncured resin from an object after it has been printed.
You should wash your object with isopropyl alcohol shortly after it is finished printing. While the curing process will have already begin inside the printer, the resin will still be far from fully cured.
Even though none of the resin is fully cured at this point, the isopropyl alcohol will still only remove the completely uncured excess resin. It is necessary to wash your object twice to remove all the uncured resin. Even after two isopropyl alcohol washes, you do not have to worry about it removing the partially cured resin.
One of the major reasons that some makers think that isopropyl alcohol cures UV resin is that using it does shorten curing times.
However, this is not because of some chemical reaction that speeds up the curing process. Using isopropyl alcohol speeds up curing times because the removal of excess resin results in faster curing times.
This means that you do not have to worry about isopropyl alcohol causing you to over-cure your object. You also do not have to worry about your object being distorted in any way by the isopropyl alcohol.
Tip: For a safe, non-flammable post-cure UV resin wash read this advice on IPA alternatives from Formlabs.
How to Tell If UV Resin is Over-Cured
It should be relatively easy to tell if resin is over-cured. Over-cured resin usually has small cracks all over. If it is badly over-cured, these cracks will be large and easy to spot.
If cracks are not immediately visible to the naked eye but you still suspect that your resin has been over-cured, look very closely at the object.
Focus on the corners and on areas where one part of the object connects to another. If you see small cracks, then the resin has been over-cured.
Cracking is not the only sign of over-cured resin. Over-cured resin will also be quite brittle. If you gently apply pressure to the object, it may crack quite easily. Be sure not to overdo it when testing for brittleness, especially if you are using a softer variety of resin.
What to do if the UV Resin is Over-Cured
If you have identified cracks and brittleness in your object, then you may be wondering what to do with the over-cured resin.
Unfortunately, there is nothing that you can do to save the object. It will be weak and will break quite easily. This means that you have no option but to throw it away and start over.
If you plan on simply displaying an object, and it is only slightly over-cured, you can still use it.
Otherwise, you have to print out the object and start the curing process all over again.
Is Sticky Resin Over-Cured?
There is a common misconception that sticky resin is over-cured. However, this is not the case.
In fact, sticky resin is under-cured.
Thankfully, under-cured resin is not ruined like over-cured resin. You can simply resume the curing process until it is cured properly.
However, you should keep in mind that even sticky under-cured resin has already been partially cured. This means that it will not take very long for it to cure properly.
It is very easy to over-cure resin in this situation, so you should keep a close eye on your object when you are finishing up the curing process.


