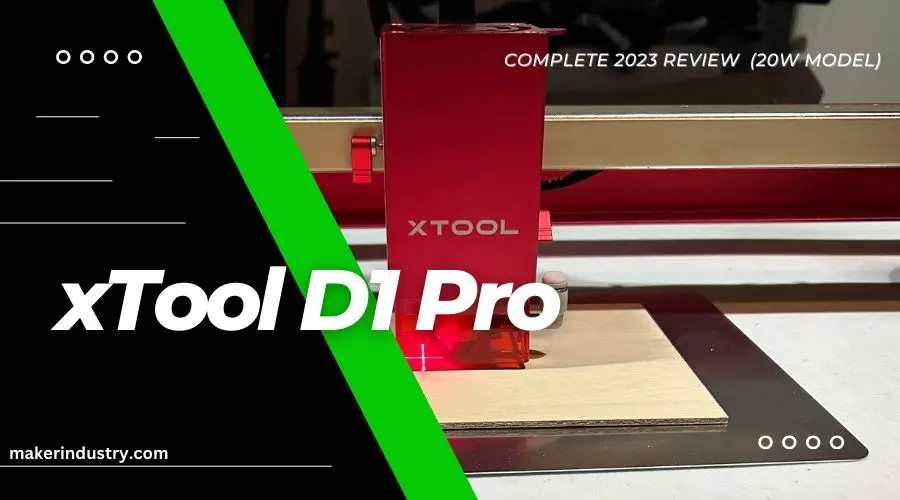
In this xTool D1 Pro Review, I’ll recap my experience with using the 20W version of this powerful and precise machine over the past couple weeks.
From unboxing and assembly, to using the software and cutting, engraving, and choosing add-ons, this is a complete overview for anyone interested in adding an excellent laser cutting tool to their workspace.
If you want to skip to my concluding thoughts and who I think this is best for, click here.
If you’re really in a hurry, here’s the TL;DR:
The xTool D1 Pro is a beautiful machine that’s fast, accurate, and powerful. If you’re looking to get started with laser cutting, it’s an excellent choice. I’ve been really impressed so far.
The 20W model might be too expensive for some, but it’s available in 5W and 10W models that can be upgraded.
I’ve already found that it produces enough smoke to warrant an enclosure (this depends on how well-ventilated your workspace is). It also took me some time to dial-in the cut parameters to reduce yellowing and edge burn.
But, all in all, I really enjoy working with this machine and think it’s one of the best options on the hobby laser engraver market, especially if you’re not ready to shell out for a pricier CO2 model.
You can purchase the D1 Pro directly from xTool here.
Let’s get started.
Unboxing and Assembling the xTool D1 Pro
Compared to some other diode models I’ve received, this one looked more professional from the outset.
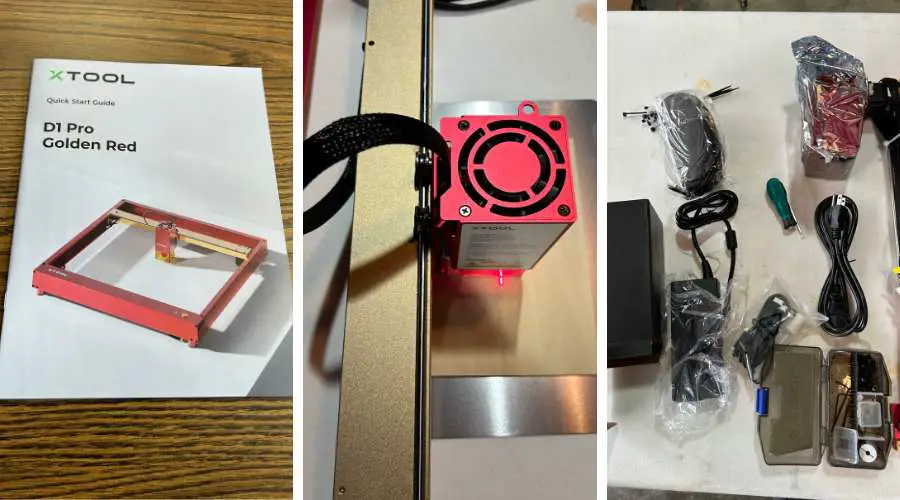
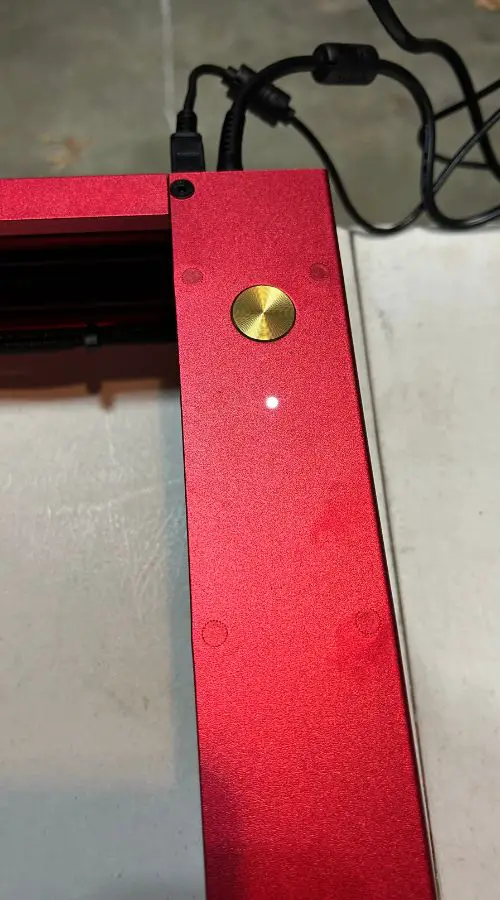
For starters, it’s the Golden Red model, featuring a beautiful and sleek red finish on the frame components.
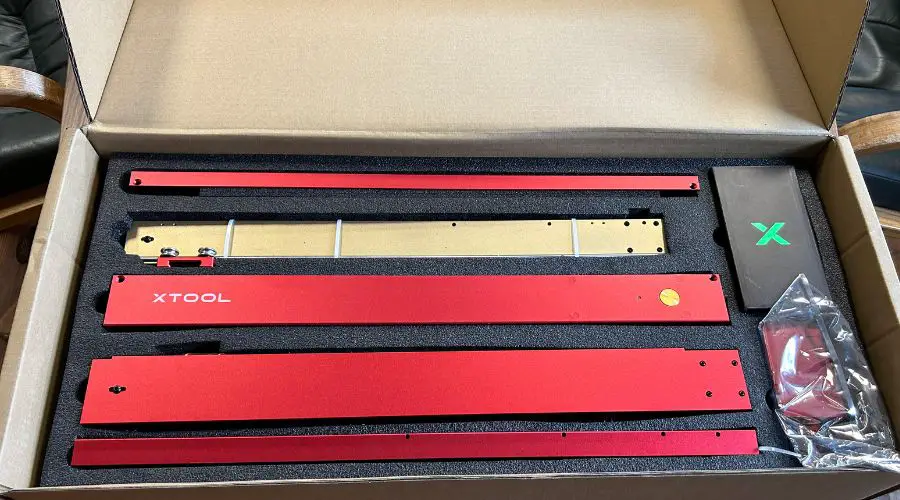
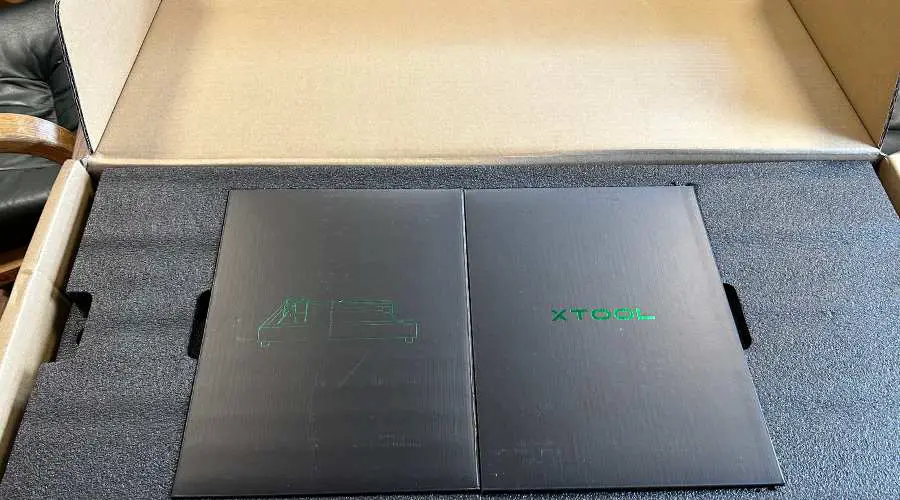
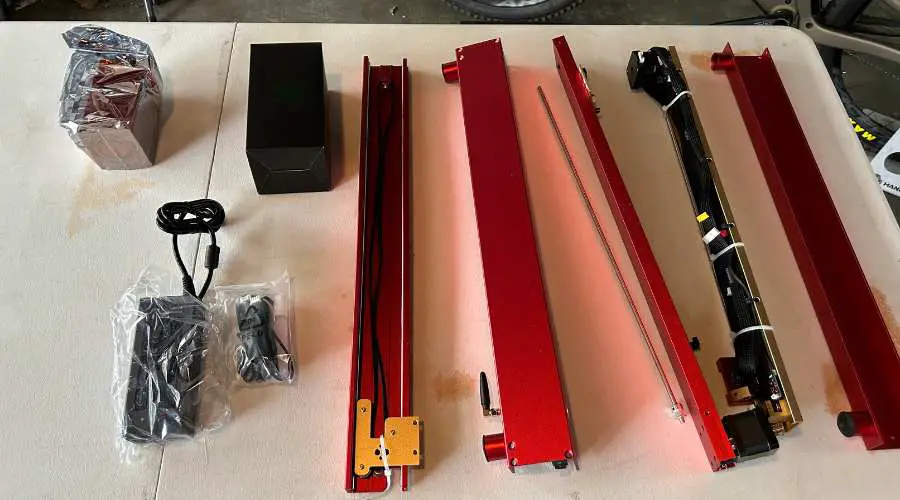
The xTool D1 Pro parts are very nicely and securely packaged. It also includes instructions, a design inspiration book, a material sample pack, a small aluminum waste board to protect your table surface, and a case for storing screws and tools (including a very handy hex tool).
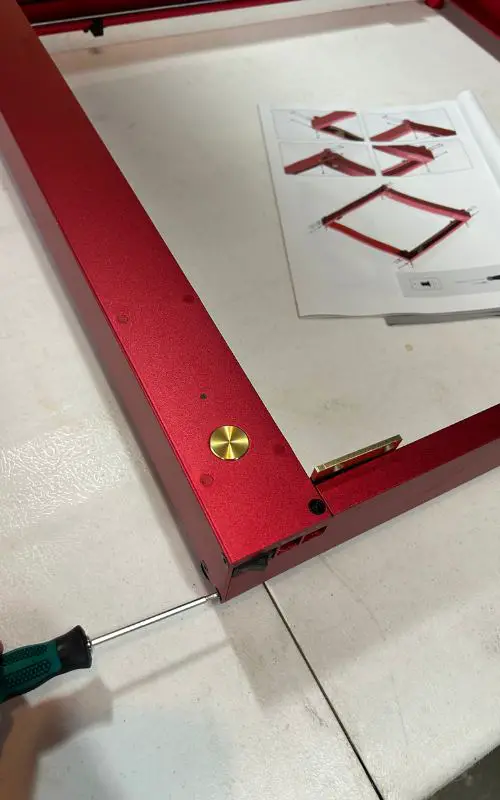
It comes with two sets of instructions, including a quick start guide with clear instructions and illustrations for setup. While the quick guide instructions were easy enough to follow, I found that they lacked some detail and seemed to gloss over some of the nuances that are actually pretty important.
For example, when you set up the tension screws for the belts, they need to be the same tension, not overly tightened, and the side frame screws need to be loosened first. There is some reference to this in the instructions, but it’s not entirely clear.
Also, it took me a few extra minutes to figure out how to tighten the thumb screw to set the module at the correct height.
Luckily, xTool provides a few assembly videos, and there are plenty of YouTube tutorials available online. Watching these videos, along with following the instructions, made the overall process and any tweaking fairly simple.
All in all, the assembly took about 35 minutes to assemble and then another 20 minutes to get it tuned up, connected and ready to cut some samples.
Getting Started with the xTool D1 Pro

After setting this up, I was ready to cut some sample projects and test the parameters for this 20W model.
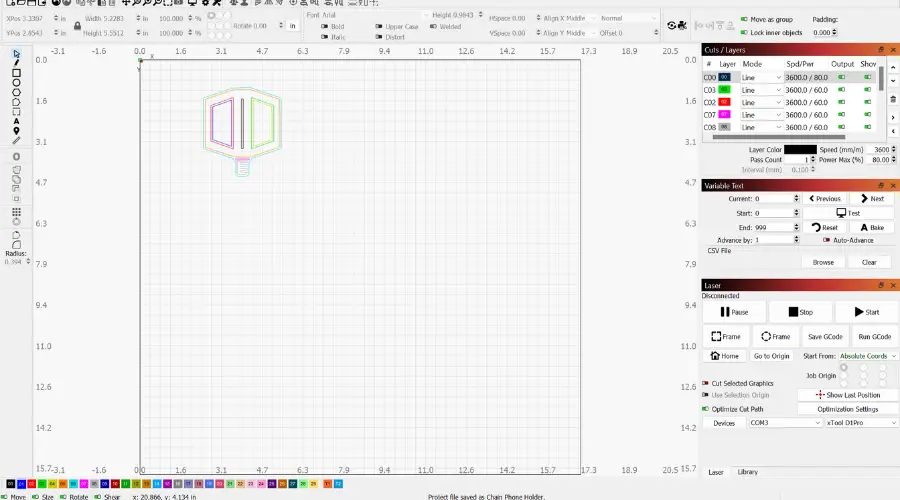
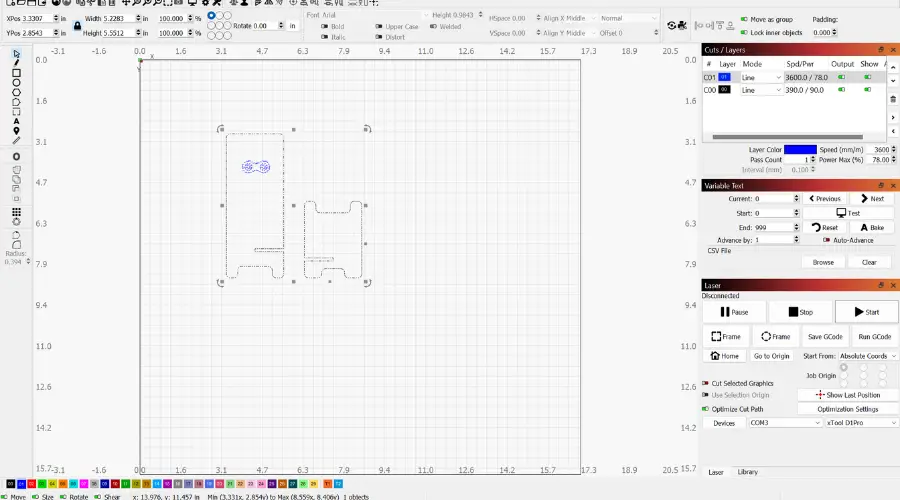
xTool provides some nice sample projects to work on, including a couple of phone holder designs. These are all XCS files and created in the free xTool Creative Space software, which is pretty simple to use and intuitive.
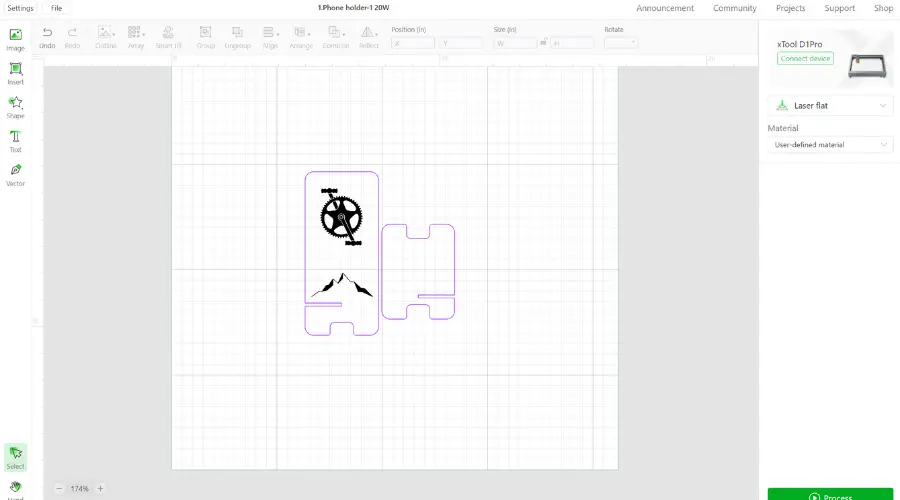
It allows for quick and easy framing, and after installing a couple of drivers, the USB connection with your laptop is very fast.
Before you start, you’ll want to understand what materials to use and what the processing parameters are.
In the XCS software, you can choose between cut, engrave, or score. Cutting and engraving seemed obvious, but I wasn’t sure about the score option. A quick search revealed that score is when you want to outline a shape, rather than fill it in or cut through completely.
Each setting has different parameter settings depending on the type of machine (i.e., D1 or D1 Pro and 5, 10, 20W) and material. In XCS, there are several predefined materials that will set the parameters based on your selection. Or you can choose the user-defined option.
I found this page on the xTool site to be extremely helpful for finding cutting settings for most materials I would be using with this machine on a 20W model: https://www.xTool.com/pages/material-settings.
You can also download a full PDF guide for all recommended cut settings available here: https://support.xTool.com/hc/article_attachments/8202957792535.
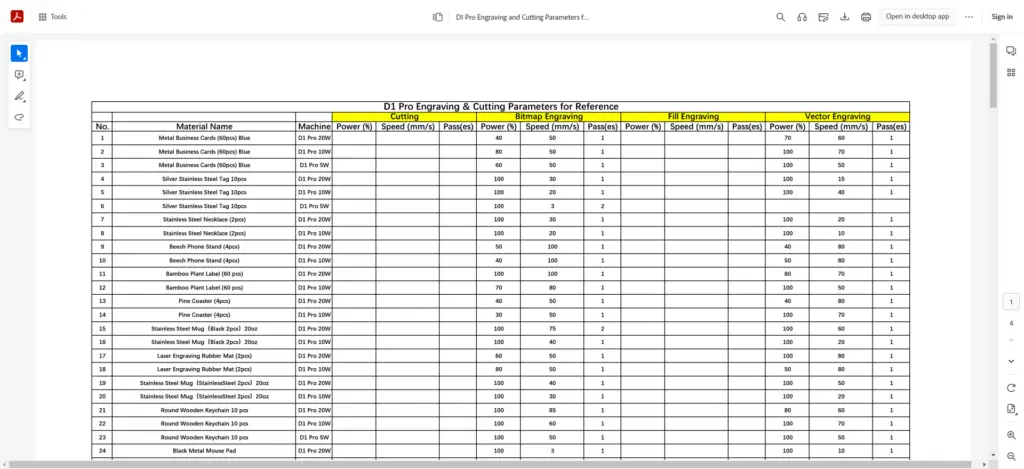
I’ve already referred back to these resources several times!
Note about Software: While the free XCS version is great, especially when you’re just getting started, I still prefer to use Lightburn.
Lightburn is designed specifically for laser cutters, including the D1 Pro. You’ll need to purchase a license (currently $60 for the GCode version – fully compatible with the xTool D1 and D1 Pro).
This software gives you more control over working with several different vector layers and different file types. And if you work with different types of machines, it’s a no-brainer.
You can’t import XCS files (these only work in Creative Space), but it accepts about everything else, including SVG, DXF, EPS, and raster image files.
I am using both XCS and Lightburn to test this machine out. But for longer-term use, I think Lightburn is the way to go.
In either case, you can connect to the machine using WiFi or USB (cord included). I prefer USB because it’s just easier in my shop and typically more reliable than a WiFi connection.
First Projects on the xTool D1 Pro 20W Model
With the software configured and my fan in place (working in my garage with the windows and main door opened), I decided to start with some small projects to test the parameters.
For these starter projects, I used the included 3 mm basswood and some 6 mm pine I had in the shop. The box also comes with samples of acrylic, cork, and more. Read the FAQ section below for a full list of materials you can cut and/or engrave with the D1 Pro.
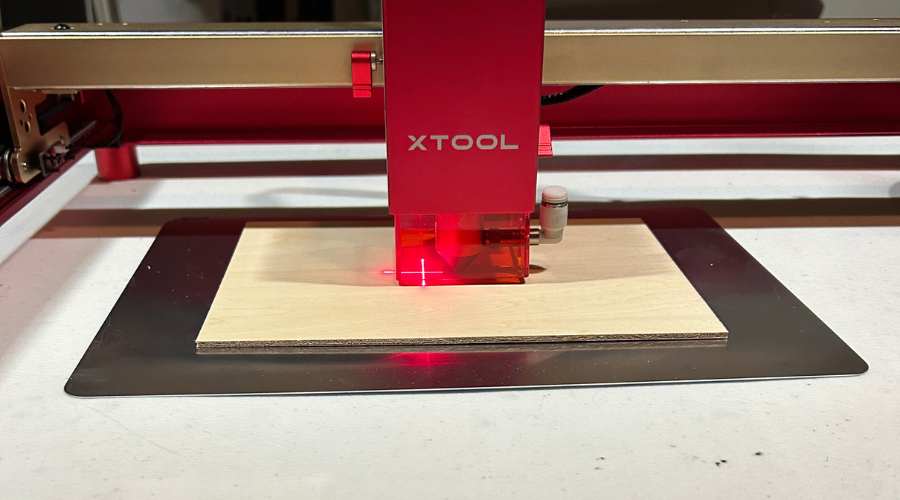
Important: make sure to set the focal point on the module before you start cutting! It’s very easy to do this on the D1 and D1 Pro – just lower the metal focal point setting arm until it makes contact with the material surface, then fold it up. Note: The 20W module also has a rear plate adjuster to set based on cutting thickness.
Operating this machine is a breeze. When it’s turned on, there is a white light indicator. Once you’ve positioned your piece and framed it using your software, the blue indicator light will blink, and you’re ready to cut by pressing the main button.
If you trigger a limit switch and emergency stop mechanism (i.e. the machine is tilted, the module is outside the work area, or there is a fire signal from too many passes), the red light will blink, and the machine’s alarm will sound.
Note: If using Lightburn, most controls, including framing and starting your cut, are done directly via the software. You really only need to press the xTool button after a limit switch is triggered.
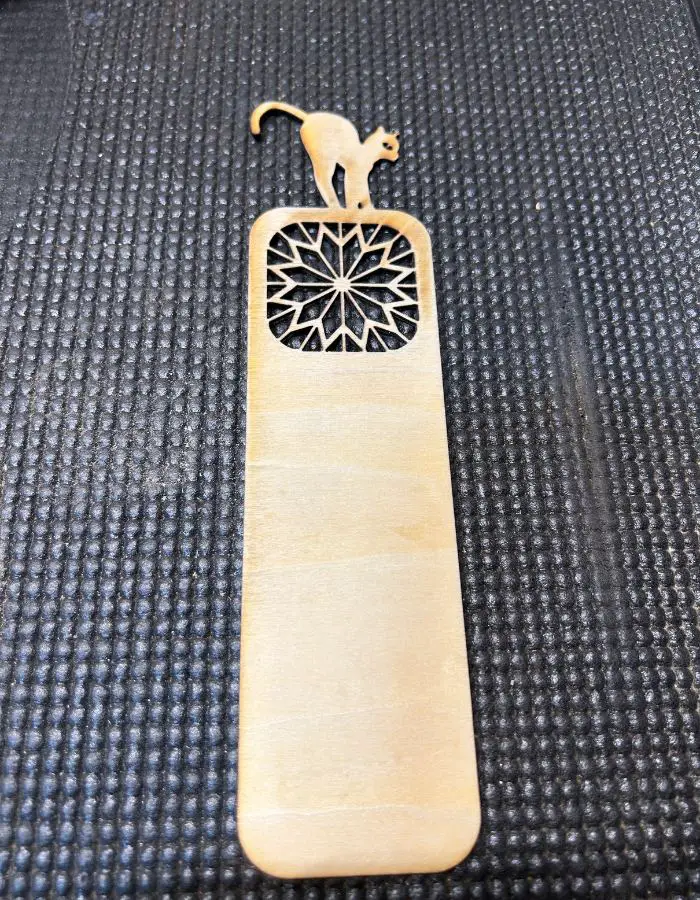
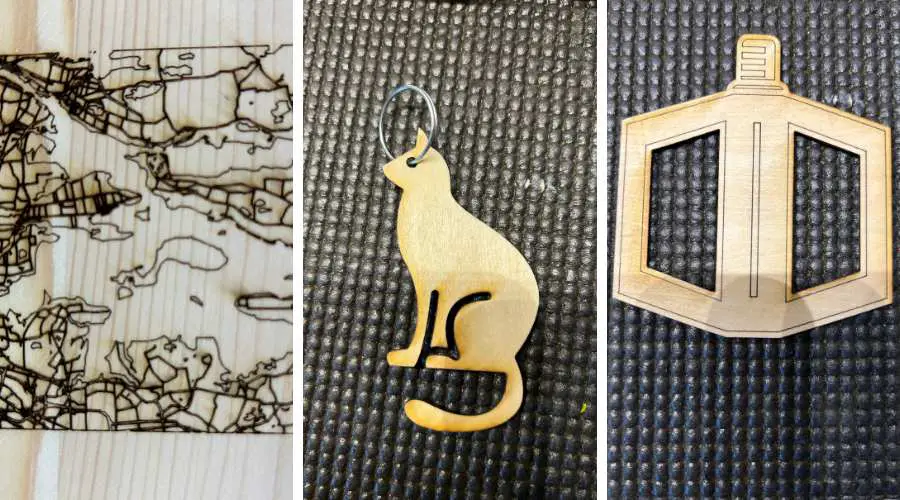
I started with a couple of cat designs (my daughter loves cats!) including a cat keychain made in xTool Creative Space and a bookmark designed in Lightburn.
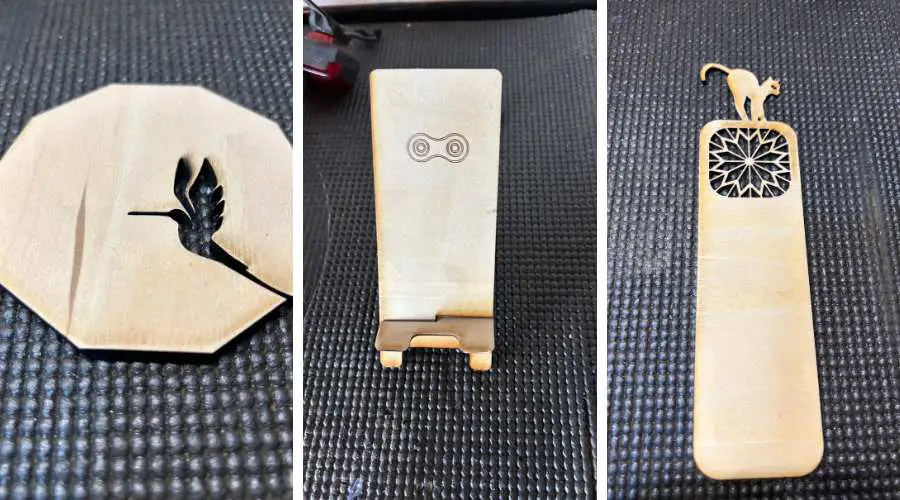
I also cut a hummingbird coaster, a simple phone stand, engraved a coastal map, and cut a model bike pedal. All pieces came out really nicely for a first pass!
Let me just say… this thing is fast, quiet, smooth, powerful and very precise!
Of course, I’m working with a higher output 20W model, which can cut up to 12 mm pine, so it’s got some extra juice (side note: you can even get a 40W laser module for the D1 Pro). But feedback from other users suggests that the 10W model is also very fast and powerful.
However, please keep in mind that when using the included bottom aluminum protective layer, you will get some flashing and scorch marks on the backside of your piece. Of course, it’s still better than cutting directly into your table!
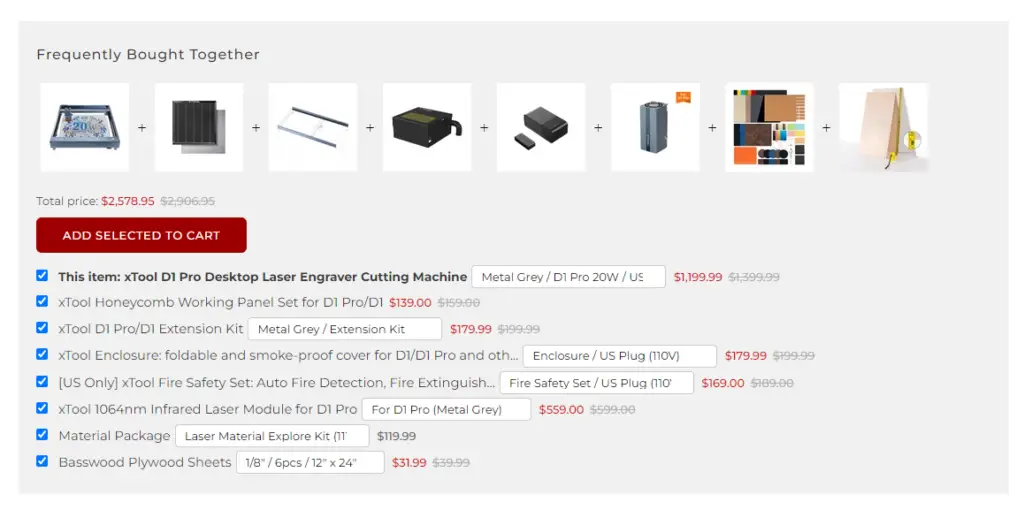
You can minimize the scorching with masking tape, or you can purchase the xTool honeycomb working plate as an add-on. This will protect the bottom of the piece and improve smoke ventilation. I’ve already ordered one!
I also ran several test pieces as well to find the right balance of speed and power and to reduce yellowing and edge burning. It’s still a work in progress, but I already ordered the air-assist attachment to make my cuts cleaner.
After working with a few of these woodcuts, my initial thoughts are that this machine excels at cutting intricate designs and engraving at different depths. I also love how seamlessly it works with Lightburn – it opens up a whole library of creative possibilities.
I plan to also work on some acrylic projects, but my preference is for wood and I plan to do an entire coaster series out of walnut, a clock face out of pine, slate engravings, and some house number signs out of 6 mm plywood. I will add these to the review as they’re completed.
While I truly enjoy working with this machine, there are some important things to keep in mind if you decide to go with this xTool D1 Pro model.
Here are some tips from my experience thus far.
Tips for Using the xTool D1 Pro (and why I’ve already purchased several add-ons)
Ok, these tips may seem obvious, and they’re applicable to most laser cutters (not just the xTool). But I need to remind myself of these tips as well, so here ya go.
Make Sure Your Workspace is Well-Ventilated
More on this below, but make sure you work in a well-ventilated area or have a proper exhaust system set up.
This is common for an open-frame laser cutter.
But the 20W model is more powerful and produces a bit more smoke than I’m used to. It’s easy to mitigate any excessive smoke by using a fan and windows. But I’ve already opted for the enclosure accessory.
Familiarize Yourself with the Software
Unless you’re already familiar with Lightburn or XCS, I would spend some time learning the basics of your software, including positioning and framing your design, setting parameters, using basic functions, importing files, organizing and modifying vector layers, detecting machine settings, and sizing your pieces.
Learning how to use the software can save you a lot of time (and frustration) when you’re getting started with the D1 Pro.
Use Test Pieces!
I understand: you already spent time assembling your machine and setting up the software. It’s time to get cutting! However, you should always do some testing first to make sure the parameters are where you need them for your design and the materials (type and thickness). Use some scrap pieces and make some simple cuts before working on your masterpiece!
Don’t Leave the Room!
I know, it’s tempting to take a stroll during any cut that takes longer than a few minutes. But please try to stay put! You never know if the module can get stuck, a piece moves, or something catches fire. It can happen! So just stay in the room while the cut is processing.
Get Some Sand Paper!
Yes, lasers cause burn marks and yellowing. This includes the D1 Pro, While you can minimize this with better parameters, a honeycomb wasteboard, and air assist, you’ll still want to use some sandpaper (i.e. 200 grit) to touch up your pieces.
Find a Better Wasteboard!
The included aluminum surface board is just not enough. You can experiment with bigger sheets, plywood, and other materials, but I strongly suggest using a honeycomb waste board to protect the bottom of your design. This matters most when cutting vs. engraving on the xTool, but it’s yet another accessory that you’ll probably want after using the machine a few times.
FAQs
If you’re new to xTool, you might have a bunch of questions before purchasing a machine.
These are the same questions I had, so hopefully, this section helps you out.
What Materials Can You Engrave and/or Cut with an xTool D1 Pro?
You can cut several materials with the D1 Pro. These include wood (i.e. pine, basswood, walnut, balsa, basic plywood), natural leather, paper, fabric, acrylic, and cardboard. You can also engrave all of those materials plus glass, ceramics, rubber, slate, stainless steel, aluminum allow, and painted metal.
Make sure you review all guidelines for cutting or engraving these materials available on the xTool site, in the xTool booklet, and in project forums, including the ventilation and burn precautions specific to each material.
Also, it’s important to review the list of MATERIALS NOT TO CUT with the D1 Pro. This includes PVC, ABS, HDPE, polystyrene foam, carbon fiber and more.
What Can You Make with the D1 Pro Laser Cutter?
It’s a great machine for DIY and home decor projects, including signs, bookmarks, layered designs and models, keychains, jewelry, decorative home items (i.e., clocks, ornaments, plaques, wall art), phone holders, puzzles, game boards, personalized items, and much more.
You can also reproduce photographs and detailed images on different materials and engrave quotes, maps, geometric patterns, and more.
There are tons of possibilities, whether you’re making these for your own use, as gifts, or to sell your creations as a side business!
Does this Machine Come with a Rotary Attachment?
No, but you can purchase the xTool RA2 Pro rotary attachment separately. It comes with 8 risers to give you the height needed to engrave cups, mugs, and other cylindrical objects. I’ve already ordered one!
How Big is the xTool D1 Pro Work Area?
The work area on the D1 Pro 20W version is 430 x 390 mm (16.93 x 15.35 inches) with a max workpiece height (without risers) of 50 mm (2 inches).
You can double or triple the max height by adding risers (necessary with the rotary attachment).
Also, if you work on larger pieces, you can purchase an extension kit to expand the work area to 936 x 432 mm.
Do I need a Fan or Exhaust System?
The short answer is… yes. I would definitely recommend using a fan with this machine and having adequate ventilation in your workspace. Ideally, you would have an exhaust system to remove any fumes or smoke.
For this, you can purchase the xTool enclosure which comes with a exhaust pipe to vent out a window. xTool also has a smoke purifier if you really need to make sure your indoor workspace is safe.
I ordered the enclosure, which can connect to the filtration system via the exhaust pipe if necessary. Right now, I have a fan, windows, and garage door which is keeping things pretty well-ventilated. But I anticipate using this machine a lot, so the enclosure seemed like a worthwhile investment.
What’s the Difference between the D1 and D1 Pro?
The xTool D1 Pro is a higher-powered version of the D1. The D1 Pro is available in 5W, 10W, and 20W versions, while the D1 is available in 2.5W and 5W versions. The D1 Pro is also more advanced in terms of features and capabilities.
What Safety Precautions Should I Take When Using This Machine?
The xTool is built with automated safety features including an emergency stop that will be triggered by the detection of flames, smoke, and tipping.
You should also keep flammable materials away from the machine when using and ensure you have proper ventilation to make sure you’re not inhaling harmful smoke, exhaust or fumes. Also, make sure not to leave the machine during a cut.
Finally, always ensure you’re cutting or engraving with a compatible material, and wear your safety glasses to protect your eyes!
How Much Does it Cost?
Currently, the 20W and 10W models are both on sale (without accessories) on the xTool website (as of 5/4/2023):
- xTool D1 Pro 20W: $1199.99
- xTool D1 Pro 10W: $699.99
Concluding Thoughts About the xTool D1 Pro
The xTool D1 Pro is a great machine for beginners and anyone else looking to start designing and producing intricate laser cuts or engravings for personal use or as gifts or salable items.

If you’re a more experienced user and need to cut thicker materials, you may want to consider a more powerful and enclosed CO2 model. But for the majority of hobby-level makers, this machine is the total package.
In summary, here are the pros and cons after experimenting with this machine:
Pros:
- Easy to use and assemble
- Very sleek appearance and excellent build quality
- Smooth and quiet operation
- Excels at cutting and engraving intricate patterns in certain materials
- A great machine to get started with laser engraving with solid free software, excellent compatibility with Lightburn, and an active community of users to learn from.
Cons:
- 20W version might be too expensive if you’re just starting out
- Produces smoke when using, so make sure you set up proper ventilation and read instructions for suggested materials and processes
- Included aluminum waste board was good when getting started, but you’ll want something bigger for larger projects
As noted, there are several accessories you may want to purchase for this machine, and that adds to the overall cost and complexity.
To be sure, you don’t need all of these add-ons (i.e. the rotary attachment, air assist, enclosure, honeycomb plate). You can just get started with the base machine.
Full Specifications for the D1 Pro 20W and 10W Models:
[table id=2 /]