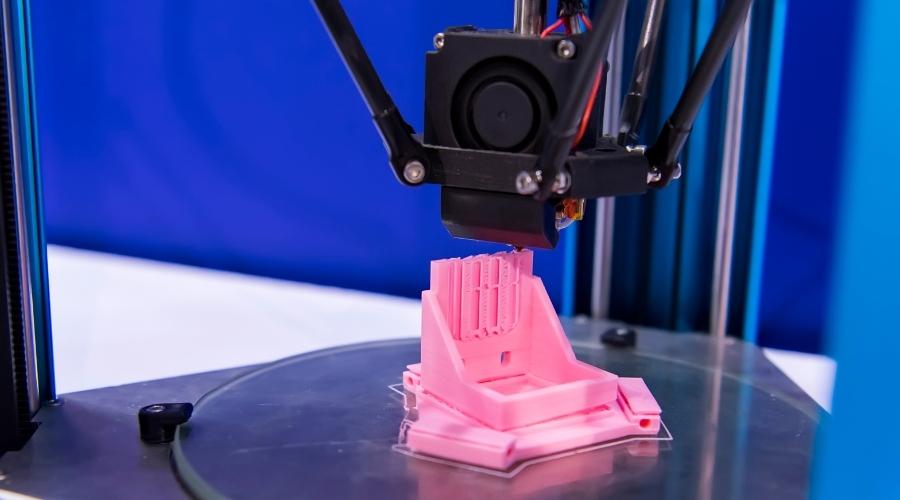
Although 3D printers open up a world of possibilities for artists and craftspeople, they do have one significant limitation – heavy loads. Yes, you can print virtually any shape or design you want, but it will likely break if you put a piece into a load-bearing application.
Fortunately, there is a way to strengthen 3D parts by filling them with resin, such as epoxy.
Epoxy works well because it’s versatile and hardens really well. So, you can both fill and coat your 3D pieces to make them more rugged and dependable. That said, filling 3D prints with epoxy is not the only option, so let’s dive into this process and see how it works.
Why Would You Fill 3D-Printed Parts?
One primary issue with 3D-printed materials is that they’re inherently weaker than other, traditional construction materials. Common types of 3D printing substances include:
- Poly-Lactic Acid (PLA)
- Acrylonitrile Butadiene Styrene (ABS)
- Polyethylene Terephthalate (PET)
- Stereolithography (SLA)
The top three options are plastic filaments, while the last one (SLA) is a type of resin. Some materials are stronger than others, but overall, they’re much weaker and more brittle than traditional options like wood or metal.
As you can imagine, 3D printing mechanical parts is a challenge because they’re more liable to break. Typically, this process is ideal for making prototypes but not finished pieces.
One way to get around this issue is to fill the parts with resin, like epoxy. You can also coat them with resin to strengthen both sides for added durability and resilience. However, this process doesn’t work for all 3D parts, so you must plan accordingly.
That said, one of the primary advantages of 3D printing is that you can customize each piece, meaning that you can make it easier to fill it with epoxy.
What is Epoxy?
Epoxy is a type of resin that requires at least two elements to work correctly. The term “epoxy” refers to a class of polyepoxides, which contains various prepolymers and polymers. The secret to epoxy’s strength and versatility is that it has to be cured. If you pour uncured epoxy into your 3D parts, it won’t harden very well, defeating the whole purpose.
To cure epoxy, you need to mix it with a curing agent. Once mixed, the solution will start to harden, but it typically takes between 24 and 72 hours to dry completely. For larger projects, you might have to wait up to a week before you can use the pieces as intended.
In the industrial world, epoxy is used as a coating or adhesive for various materials and processes. For example, some manufacturers mix epoxy with carbon fiber and fiberglass as reinforcement material. So, if it works well for industrial applications, it should work well for at-home 3D printing, provided that you use it properly.
How to Fill 3D Parts With Epoxy
There are two ways to use epoxy to strengthen your 3D pieces. First, you can fill a solid part or paint the epoxy on the surface. Let’s break down the steps necessary to do both.
Filling 3D Prints With Epoxy
- Step One: Print the Part as Normal
- Step Two: Let the Print Cool
- Step Three: Sand the Surface to Remove any Imperfections
- Step Four: Heat and Mix the Epoxy (the resin needs to be heated to become more viscous for pouring)
- Step Five: Fill the Part
- Step Six: Let Dry (or you can “bake” the epoxy in the oven at 100-125 F for about 20 minutes)
Coating 3D Prints With Epoxy
Follow the first four steps.
- Step Five: Put the Epoxy in a Plastic Bag (don’t use a bowl or container since you can’t remove the epoxy once it dries)
- Step Six: Dip the Part (keep it there for about 20 to 25 minutes so the epoxy can fill in any gaps)
- Step Seven: Remove the Part and Let Dry
If you’re coating larger pieces and don’t have enough epoxy to dip them, you can use a brush to directly apply the resin to the part. Again, you’ll have to wait up to 72 hours for the epoxy to dry completely. So, you might have to worry about it dripping or sliding off before it sets. If possible, lay the piece flat and coat the top side. Then, after about 24 hours, you can flip it and cover the other side.
Other Filler Materials to Strengthen 3D Parts
Although epoxy is an excellent choice, it’s not the only way to fill or coat your 3D prints. Here’s a quick rundown of other filler materials you can use.
- Bondo Glazing Putty – This material comes in a squeeze tube, similar to what you’d use for caulk. The putty is also similar to caulk, and it’s ready for sanding in just 30 minutes. Best of all, it doesn’t require any mixing and won’t stain your finished piece.
- Bondo Body Filler – If you’re in a rush, you can use this two-part compound to coat or fill your 3D prints. You have to work fast because it dries in minutes, compared to epoxy’s 72-hour window. The Body Filler is also easy to sand.
- Apoxie Sculpt – Although the name sounds familiar, this product is a modeling putty that works similarly to epoxy. You need to mix both compounds (along with the colors of your choice) before filling or coating your piece. This material will dry in about 24 hours and deliver a glossy finish. One advantage of Apoxie is that it bonds to all surfaces and is naturally waterproof.
You can find other fillers and strengthening products, including sprays and adhesives. It’s best to plan your project in advance so that you can choose the best filler for your needs. In some cases, you might only have to fill some gaps for a smoother finish. In other instances, you may need to fill a part completely to be used in a mechanical device.
Bottom Line
Since 3D printing is still in its early stages, most creators and fabricators are figuring out how to utilize different techniques. Overall, what matters most is the reason behind filling 3D prints with epoxy.
Ideally, you can make a small prototype of your finished piece and determine which parts need strengthening. From there, you can enlarge the whole piece and see if epoxy gives you the best results. Otherwise, you can try other filler materials to see which one is ideal.


