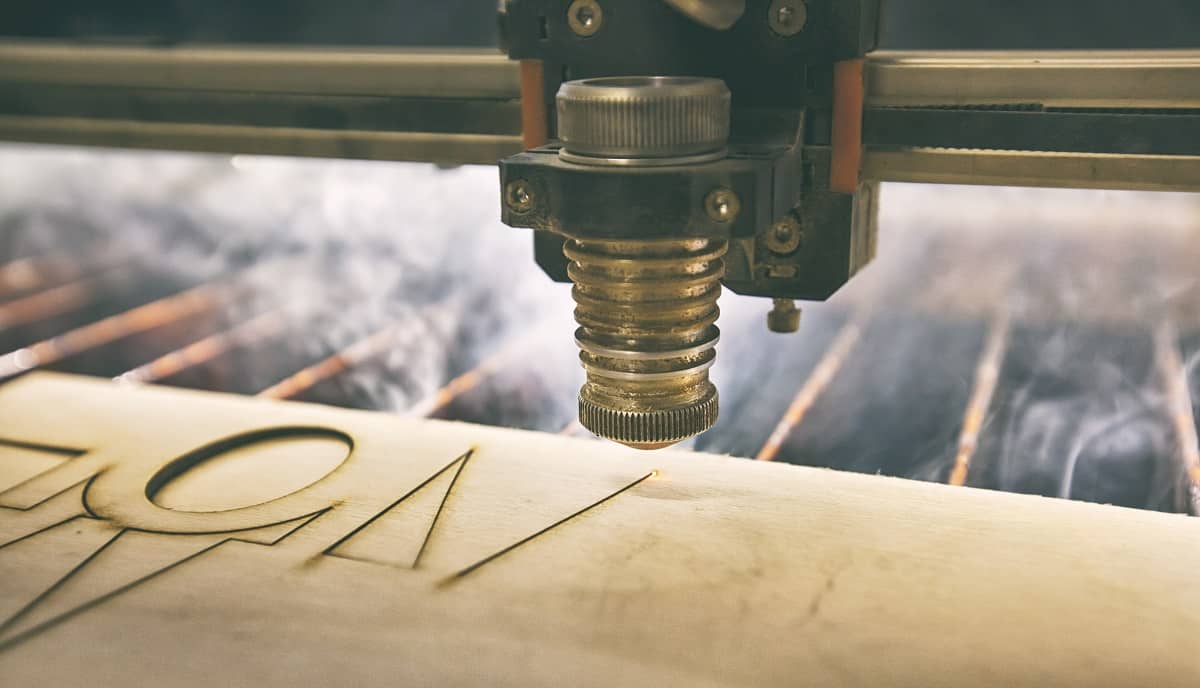
Wood is one of the most common materials that is used when laser engraving and cutting. And of the most common issues that folks face when engraving wood is finding laser cutter burn marks around the edges of the cut, which leaves the finished product looking messy and unattractive.
So let’s take a look at the steps you can take to prevent burning when laser cutting.
What Causes Burning?
It is essential to know what the actual cause of the burn is before attempting to remedy the problem. Usually, the burn marks are not caused by the high powered laser beam coming into contact with the surface, but instead are caused by the debris and fumes that are emitted during the cutting process.
There are several methods that can be used to avoid this problem, which we will get to in a moment. Note that burn marks do not appear on every single material that you laser cut; laser cutters, and engravers will either melt, incinerate, or vaporize certain materials depending on the composition and density.
Due to the extremely high temperatures that laser cutters operate at, the fumes that are produced during the cutting process scorch the surface close to the area that the laser beam cuts the material. The basic principle behind laser cutters and engravers is a CO2 laser precisely burning through your material, like wood.
This means that you should expect at least some burning or browning along the edges of the engraving. While a certain level of this is to be expected, it can become problematic very quickly, and significant soot and charring can make the material unattractive or no longer aesthetically appealing.
The most noticeable and significant form of scorching and charring will appear on materials that are primarily combustible. Acrylic, and other materials of the sort, will likely appear somewhat glossy or melted, but there will be barely any noticeable marks where the laser beam has cut.
Marks can sometimes appear on the reverse side of the material where the laser beam has come into contact with the cutting bed, so you will want to prevent as much connection between your cutting project and the cutting bed as possible.
How to Prevent Burning during Lasering
There are several ways in which you can prevent burning or scorching, or at least minimize the marks that are caused by burning. Let’s go over some of them now.
Use Tape to mask wood before engraving
This is a sort of alternative home remedy that has proven to be useful for many people who experience burning when using their laser cutters. All you need is some everyday household masking tape that can be found at most office supply or craft stores.
This method involves you covering your entire project surface with masking tape before you begin the actual cutting, and once the design is cut, you will need to remove all of the tape. This works as it prevents the edges of the engraving from becoming stained, while any significant cutting marks will be left on the tape rather than the surface of your cutting material.
Removing the masking tape may be a time-consuming process, but it can end up being worth your while in the end, as you have not sacrificed your project to any unsightly brown marks. You can use any type of masking tape for this remedy, but you may have to find one with either a low or high stick, depending on the material that you are using.
A more expensive, but less time consuming option is transfer tape used for vinyl cutting. Great for preventing burn marks and for other finishing options such as painting or staining.

Adjusting the Laser’s Focus
In order to adjust the focus of your laser cutter or engraver, you will need to change the setting of your device to ‘manual’ and then lower the focus of the laser beam, which is said to keep the level of smoke to a minimum while still allowing the more delicate cuts and engravings to be made on your project.
You should also try always to use air assistance when you are cutting. Air assist is generally just compressed air that is directed to the point at which the laser beam makes contact with the material, and can help prevent or reduce scorching on a wide variety of materials.
How to Remove Burn Marks
So, you’ve done everything you can, you’ve followed the steps above, and somehow there are still some burn marks left on your project. How do you get rid of them? The answer is actually rather simple.
You could start by sanding the material, which is probably the apparent solution for more skilled laser cutters, but it’s worth mentioning anyway. If there isn’t a whole lot of charring on your project, you can use fine-tooth sandpaper on the edges, so long as you are not threatening to tarnish the fine details of your project.
Otherwise, you could use some denatured alcohol if you are after a more thorough solution, or if you still have some minor stain on the engraved edges. Denatured alcohol is generally used on wooden furniture, which is why it can also be used to remove scorch marks.
Conclusion
Burning can be one of the most frustrating problems that all laser engravers and cutters will encounter at least once. It is a kind of rite of passage. If you have the money we recommend the vinyl transfer tape, otherwise just follow the steps above, and scorching and burning will never be a problem for you again.