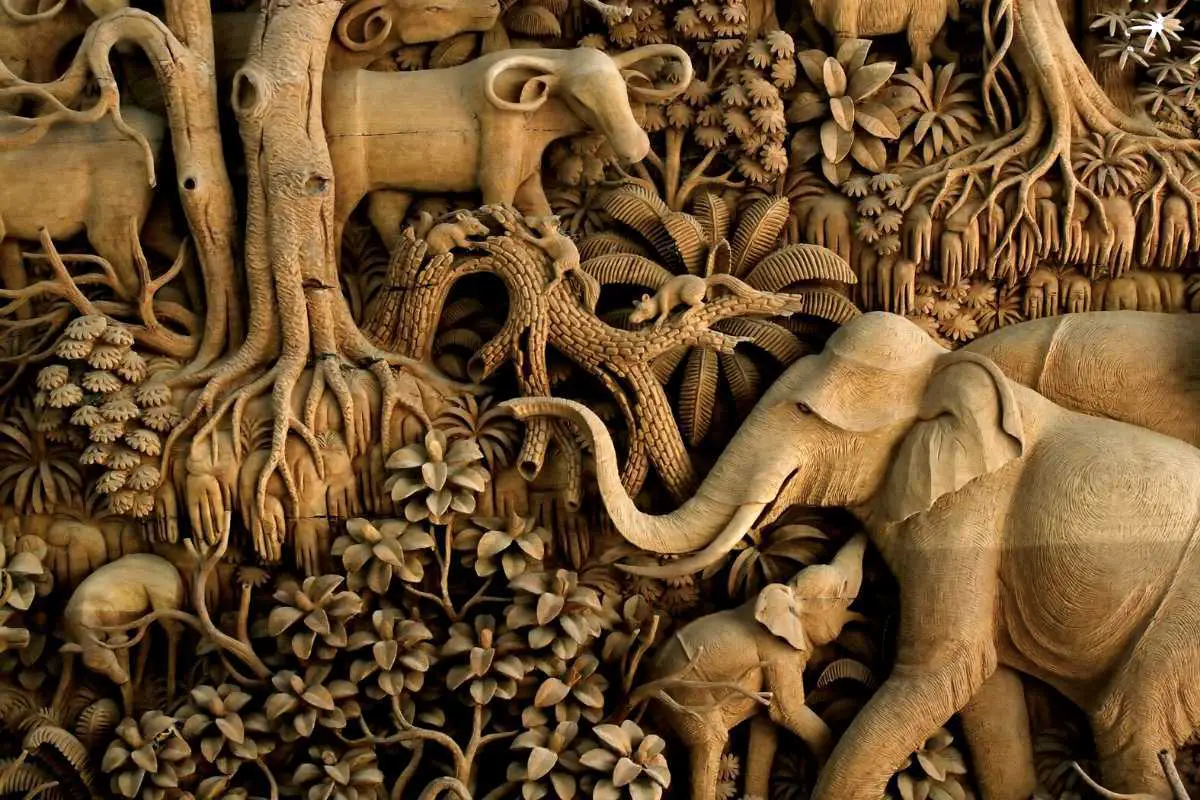
Wood carving is one of the most ancient art which is still the favorite hobby of many art-lovers. Transforming a useless piece of wood into a beautifully carved piece is one of the most wonderful feelings ever. It truly gives a sense of establishment. Although you need to learn a few wood carving skills, once you get the hang of it.. there is nothing that can stop you!
So, if you’re looking for some new project to work on in your leisure time, then wood carving can be a perfect hobby for you. In this article, we are going to tell you each and everything from the methods of wood carving to the tools and also some of the easiest wood carving projects. This is gonna be very interesting, so make sure you read till the end!
What is Wood Carving?
Many people confuse wood carving with woodworking, which is not entirely true. Wood carving is an art form of cutting the wood either by hand tools or power tools to create something aesthetic. It usually requires knives and chisels to create wooden figures, sculptures, ornaments or any other objects. Sometimes the term “wood carving” is used to denote the finished wooden object.
Wood carving has been very popular for a long time. However, it is practised much lesser than the stone or metal carving because wood is vulnerable to insect attacks, decay and environmental conditions. But whatever be the reason, it is one of the greatest hobbies. Whether you’re a woodworker or not, you should definitely try your hands on it!
How Do You Carve Into Wood?
Wood carving is very simple and practical as compared to carving on the other surfaces. However, to learn this amazing art, you need to gather the supplies and practice a lot. Because, that’s the only way to learn wood carving. But the good thing is, carving the wood is so much fun and relaxing as well!
For carving a piece of wood, you only need to remember and follow the five basic steps.
- Choose a wood carving project
- Gather The Supplies and Materials
- Practice The Cuts on Scrap Wood
- Work on the Final work piece
- Seal And Protect The Finished Object
Let’s discuss these steps in detail.
Choose a Project You Want To Work On
After making your mind for wood carving, the very first thing you need to do is to pick a project you want to work on. You can easily find tonnes of beginner-friendly wood carving projects on the internet. Further, you can also purchase a desired wood carving plan if you want.
Gather The Supplies
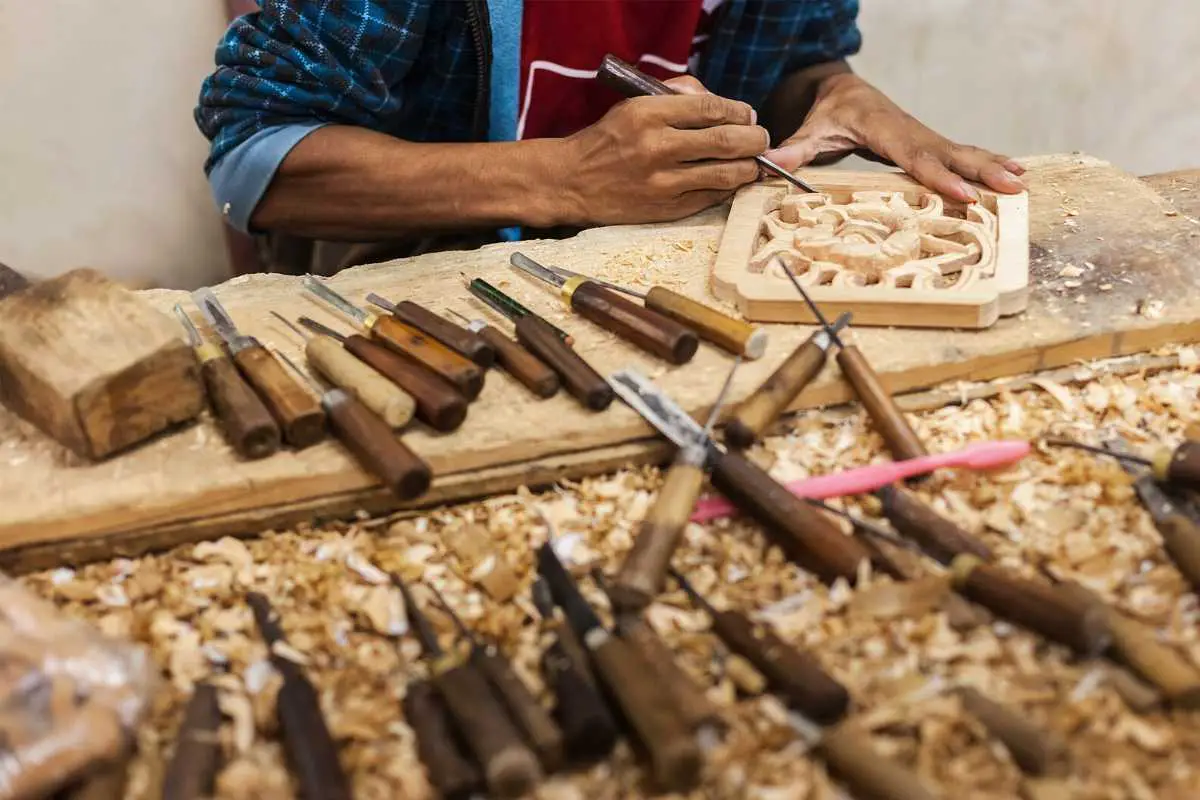
Next, thing you need to do is to collect all the tools and other supplies you’re going to need. This will depend on the type of project you’ve picked to work upon and also on the technique you’re going to use. There are four types of wood carving including relief carving, chip carving, whittling and round carving. You can select any one carving style and learn about it in detail.
No matter which technique you use, you will need a fine set of carving knives, chisels along with several other tools. Basically, you’re going to slice the wood little by little to create different kinds of 3D designs.
Here are the basic supplies you’re going to need :
1. Select the wood
As a beginner, you should select a softwood which is easy to work with. You can easily get it from your home depot, a local craft store or a wood supplier. The main types of carving wood include butternut, white pine, oak and basswood. Out of these, the easiest woods are butternut and basswood. These are soft and hence you don’t have to apply much pressure while chiseling them. Also, butternut and white pine can be used for any type of wood carving technique.
2. Get The Right Carving Knives
Although there are many power tools available, the best option for a beginner is to go for a sharp and handy knife. Make sure that the knife you’re purchasing is sharp, has a good grip and is sturdy. You can go for a chip carving knife as it is easy to handle and offers an excellent grip. Also, it should be made from iron or high carbon steel so that it doesn’t collapse just after one project.
Furthermore, if you don’t want to invest a lot, you can go for a utility or craft knife with a sharp blade.
3. Get Gouge Tools
Gouges basically helps you to scoop out the chunks of wood. These are used for shaping and smoothing the surfaces. Thus, you will require quite a few sets of good quality gauges. The most commonly used gauges are U and V gouges.
4. Get The Chisels and Mallets
Chisels are the flat tools that are used for chipping the wood. These are used in conjunction with the rubber mallets. You can go for carpenter’s chisel or skewed chisels, both of these are great for beginners. As far as the hammers are considered, buy traditional rubber mallets. These are less bulky and don’t make a lot of noise. Also, they are pretty safe than the metal hammers.
Practice The Cuts
After gathering the supplies and understanding the techniques, start applying them on the scrap wood. You need to practice a lot before working on the final project. This will not only help you to learn the skills but also make you familiar with the tools.
Work on The Final Project
After practising enough, get started with the final project. Make sure not to forget wearing the safety equipment as woodcarving can be dangerous if you’re not careful enough. For that case, wear your carving gloves and safety glasses to protect yourself from the stray scraps and other injuries.
After that sketch the design on the wooden piece using a pencil. This drawing will guide you and help you to carve precisely. Once you are done, pick your tools and start chipping off the wood.
First, cut the basic shape and finish it and once you’re done, start working on the finer details.
Because the finishing tools are very sharp, be very careful and make sure you don’t harm yourself. Take one part at a time and do it very slowly.
Seal And Protect The Finished Object
Finally, it is the time to seal and protect your final object. So, once you’re fully satisfied with your work, you have to apply a finishing product on your art to protect it from dirt, moisture and other things like that. Although you can get a number of finishing oils, wax and sprays, the most inexpensive finishing product you can use is linseed oil.
You can also use paste wax and danish oil. While wax seals the art and allows the wood to retain its true color, oils tend to tint the wood a bit which looks pretty good. It is totally up to you what kind of product you want to use.
Moreover, spray polyurethane and urethane are very durable and result in a glossy finish. Make sure to apply the finishing on a sunny day so that you can let the piece dry very well.
So, this was all about the entire wood carving process. It may sound like hard work at first but once you get comfortable with it, this will be your most favorite hobby.
Engraving vs Carving
Majority of people consider engraving and carving to be the same, which is not the case. Both of these are similar but a bit different techniques that lead to different results. This is the reason why engraving and carving should not be used interchangeably. Let’s discuss the differences and similarities.
Engraving
Engraving means to cut according to an incise. It requires one to cut any surface like wood, stone or metal using the graving tools to achieve a pictorial representation.
Further, the term “engraving” is also used to denote a printed picture or a block and hence it emphasizes the work of the artist who created it.
Carving
Similar to engraving, carving is also a woodworking technique but instead of working lightly with incised design, it requires chiselling the wood to turn it into a multi-dimensional object. It requires more skills and results in a high quality finished goods.
What is the difference?
Both engraving and carving are woodworking techniques that are used to chip off a piece of wood to create the desired object. Although the main difference between both of these techniques, is that carving is used to create multi dimensional wooden objects, where as engraving is used to carve the wood according to a printed design.
Best Wood Carving Tools
Woodcarving can be as simple or as difficult depending upon the project you choose. But every woodcarver requires a good set of tools to work with ease and precision. While a single chip-carving knife is enough to do some amazing work on a piece of wood, adding some other power and hand tools increases the scope and possibility to do something great.
There are a variety of hand tools such as knives, chisels, jack planes, gouges, mallets etc. and there are power tools such as a band saw, drill press, shaft, chain saw etc. that you can easily find at a carver’s shop or even online.
Below are some of the most common hand carving tools :
| Best Wood Carving Tools |
|---|
| 1. Chip Carving Knife |
| 2. Carpenter’s Chisels |
| 3. Skewed Chisel |
| 4. Gouges |
| 5. Mallet |
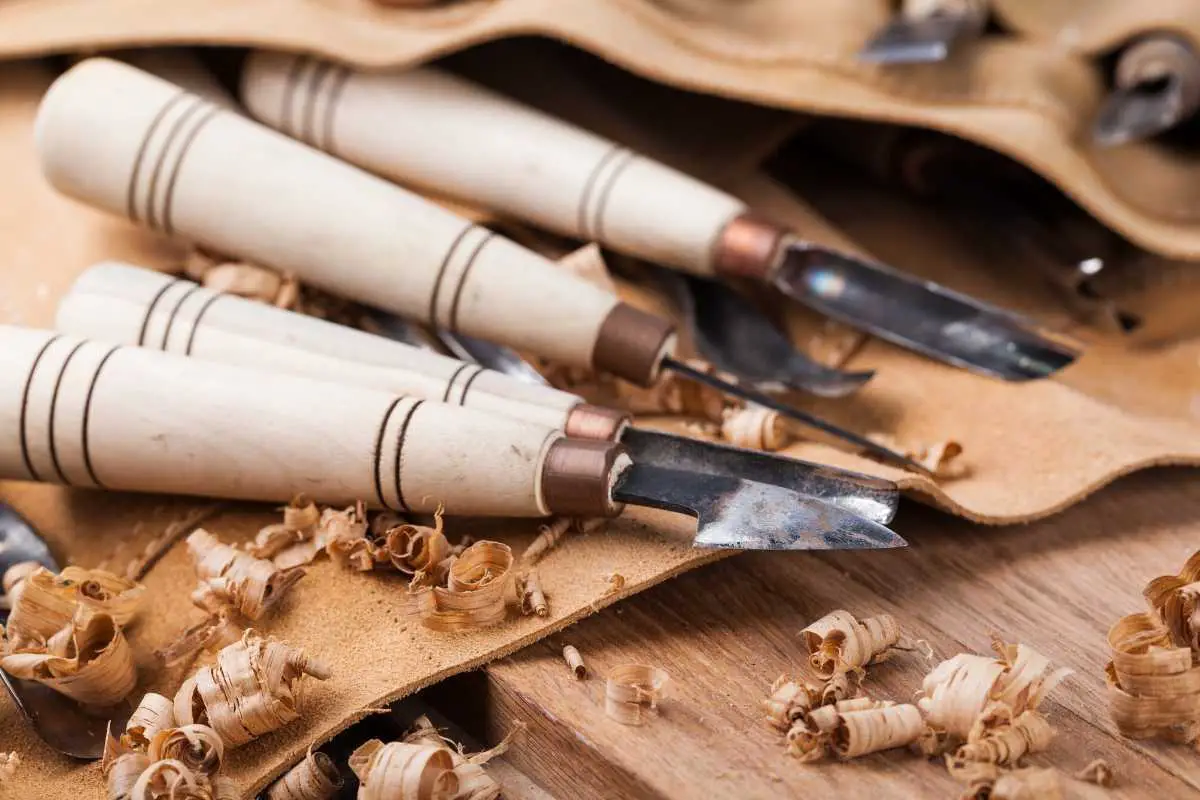
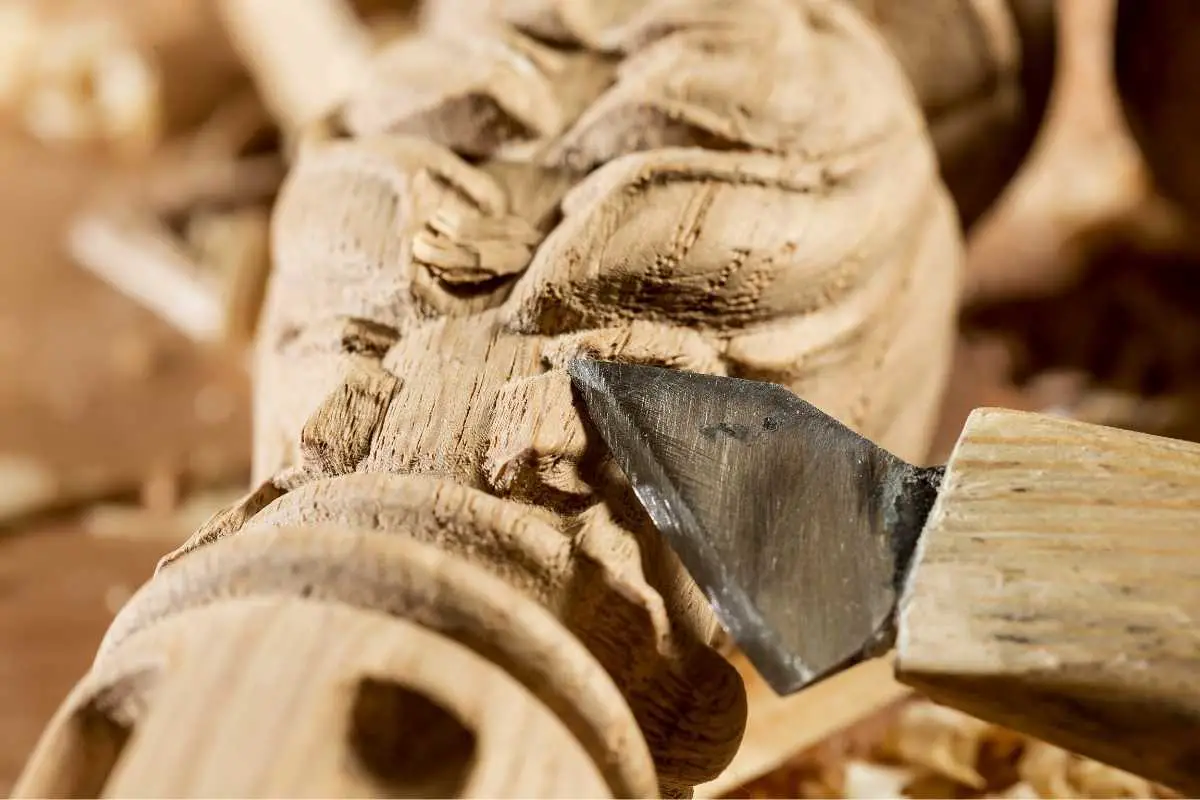
1. Chip carving knife
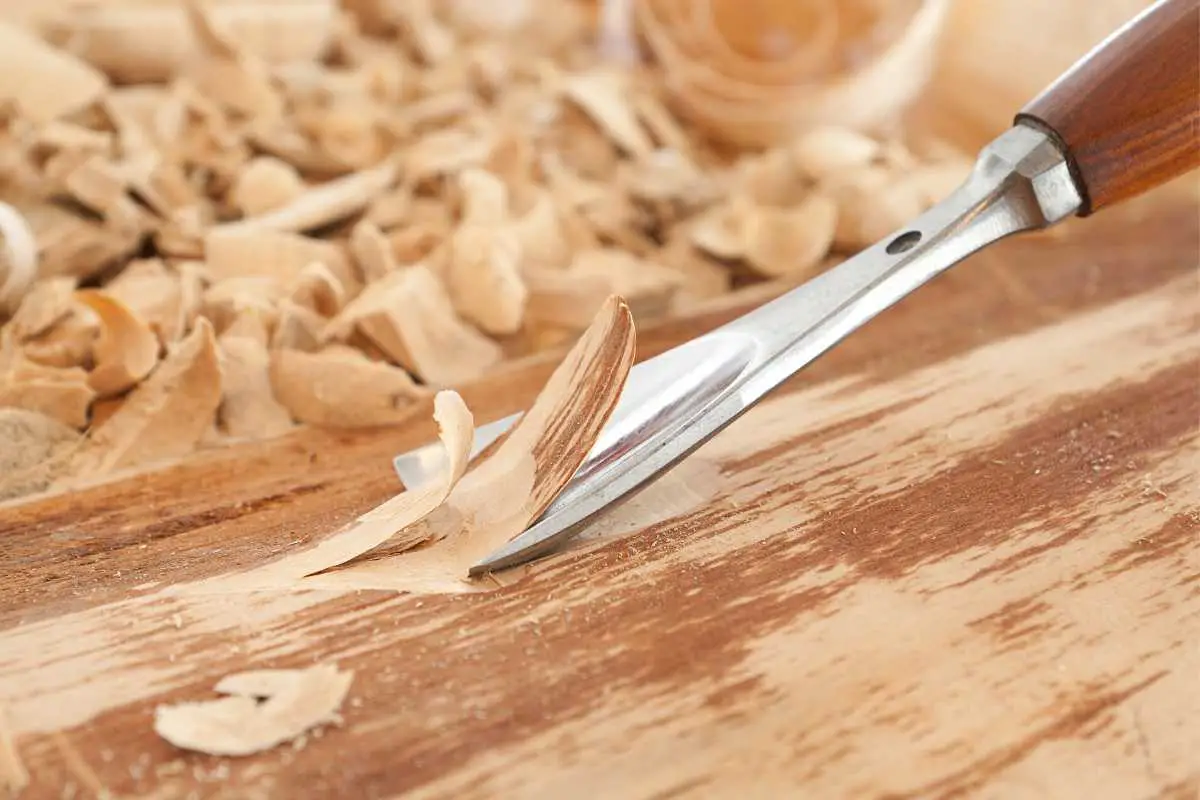
Chip-carving knife is the first and most important tool you need for woodcarving. It is mainly used for chip carving and whittling. It usually has a 1″ long blade and a handle that offers a great hand grip. Make sure to buy a carving knife that is made from high carbon steel as it is more durable and efficient.
2. Carpenter’s Chisels
Another important hand tool is the carpenter’s chisels. These are basically flat chisels that are used to shape and smooth the surface of the object. Moreover, these can not be used for figures and figurines as they tend to dig deeper into the wood.
3. Skewed Chisel
Skewed chisels come with an angled edge of 45 degrees to offer clean and detailed cuts.
4. Gouges
A few gouges are always a great addition to the woodcarving toolkit. In fact, these are the main drivers of wood carving. There are different types of gouges including the U-gouge, V-gouge, Bent gouge, Spoon gouge etc.
Here are the different kinds of gouges:
U-Gouge
These are designated in terms of the width of the cutting edge in mm, the curvature, the sweep and the shape of the shaft.
While purchasing the U gouges, consider the following characteristics :
- They are available in widths ranging from 2mm to 60mm.
- Comes in straight, spoon, bent and back bent variants.
V-Gouge
These gouges are designated by the V-shaped bottom edge and the space between the upper edged tips.
While purchasing the V gouges, consider the following characteristics :
- Available in widths ranging from 2mm to 30 mm
- Available in 60 and 90 degrees
Bent and Spoon Gouges
These gouges are used for fine detailing. Because of their small size and curved shape, they reach the most difficult places of the carving.
While the bent gouge features the entire curved length along the shaft, spoon gouge has the 1” spoon-shaped shaft.
Additionally, there is also back-bent gouge which is basically a spoon gouge with a reversed curve.
5. Mallet
Mallet is basically a compact hammer which is specially used for carving. The traditional mallet comes with a cylindrical and heavy bottom made from hardwood. But, these days, rubber mallets are most widely used. The reason is, it is much easier to work with and make less noise.
Hand tools vs Power Tools
No matter what tool you choose for your wood carving there will be pros and cons to each one. Some people may prefer power tools due to the speed and versatility it brings, but some love the raw handcrafted touch of a hand tool.
Power Carving Tools
| Best Wood Carving Power Tools |
|---|
| 1. Dremel |
| 2. Sanding Discs and Drums |
| 3. Drill Press |
| 4. Belt Sander |
| 5. Bandsaw |
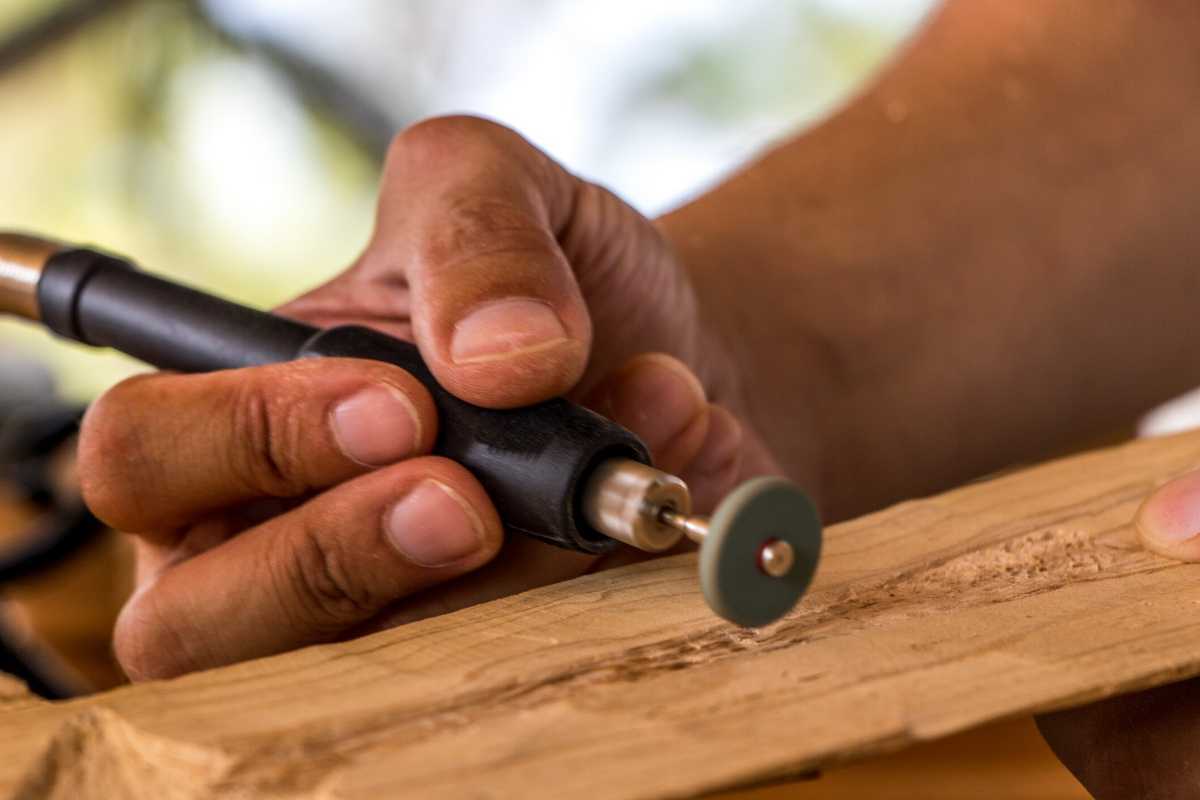
1. Dremel
Having a versatile oscillating tool is a great carving option to have in your toolbelt. You will be able to attach a wide variety of attachments to your dremel that achieves a great result.
2. Sanding Disc and Drums
There are also electric sanding and fishing tools that are used for smoothening the finished product. These are time saving and provide great results.
3. Drill press
Drill presses are invaluable tools in the world of woodcarving. These are mainly used to drill holes but when used with certain other attachments, they can be used for cutting edges too. Further, they can also be used with the sanding drum.
4. Belt sander
Belt sander is an important and handy tool in woodcarving. It is used for smoothing and finishing the surfaces. Belt sander is definitely a must have tool that results in a great final object.
5. Bandsaw
Band saw is a widely used power carving tool which is used mostly by professionals. It has a long and sharp blade that is welded in a loop. There is a powerful electric motor that keeps the blade running between the two giant wheels. A band saw is the favorite tool of the woodcarvers. It makes carving a lot more easier and accurate. It chips off large chunks of wood in a snap, therefore, you will save a lot of time as well as the efforts. If you are using a lot of power tools, then we highly recommend a good dust collector.
The Best Wood Carving Tools for Beginners
Different types of tools serve a different purpose. Depending upon your level of proficiency, you can get yourself any kind of tool. However, if you’re just beginning with wood carving, then you should begin with the simple hand tools. While power tools are great as they save a lot of time and effort, they require some experience. Moreover, power tools also come at a great price.
So, begin with the basic tools and once you get some experience in wood carving, you can always move to the power carving tools.
BeaverCraft’s S15 Wood Carving Kit

Whether you are a beginner or a pro, this wood carving kit is going to make your work much easier and precise. The knives included in this kit are sturdy and sharp. All of them have solid handles that offer amazing hand grip. Also, their ergonomic designs make sure you don’t get hurt while holding them for long. This is one of the best carving kits for beginners.
By using these tools, you can make the finest details which the other tools fail to provide.
This handheld toolset will help you furnish your carving skills to a greater extent. This kit includes a detailing knife, a roughing knife, a cutting knife and a polishing compound. Moreover, it doesn’t take much of your space and comes along a leather piece for sharpening.
Pros
- Easy to use and completely safe
- Provides excellent grip
- Doesn’t take much space
- Perfect for beginners
Cons
- The handles of the knives are a bit long which may not be suitable for small hands.
Elemental Wood Carving Toolkit

If you’re looking for some high-quality knives and chisels, the Elemental wood carving toolkit is for you. It is an amazing 9-piece toolset that works perfectly for hard as well as softwoods. These knives are sharp and have rounded handles that feel comfortable in hands. There is also a sharpening stone included in the kit. Further, there is a detail knife, a sloyd knife and hook knives… all with wooden handles.
Sloyd knife can be used for whittling and chipping, hook knife for chopping the edges and finally the detailing knife for working on fine spots. These are pretty versatile tools that can be used by anyone with little or no knowledge.
Pros
- The most recommended toolset for beginners
- Suitable for carving simple crafts
- Works well with soft and hardwood
- Comes with a sharpener stone.
Cons
- Contains only three knives.
JJ CARE Wood Carving Tool Kit for Beginnesr (8 pcs)

For the wood carving enthusiasts who are looking for a value for money carving toolkit, this set is perfect! It is a high quality 8 piece set that comes with 10 wood blocks. Comes with a grinding stone for sharpening the knives.
The other accessories that come along this toolset is carving gloves that will save you from cutting and harming yourself. Further, all the knives have different shapes and sizes but comfortable handles.
Pros
- It includes high-quality non-sliding gloves that protect the hands from injuries.
- Comes with a good leather strop
- 10 wood blocks
- Rounded Handles
Cons
- Only ideal for basswood
Wood Selection Guide
We have discussed everything about the woodworking techniques to the tools but what about the selection of right wood? Well, say no more! We’ve got you covered.
What is The Easiest Wood To Carve?
There are a variety of woods that are used for carving purposes. Each one of them has its own set of characteristics, textures, pros and cons. The selection of wood depends highly upon the kind of project you’re working on and your proficiency level.
As a beginner, you should be using a softwood as it doesn’t take much effort and is easy to work with. Here are some of the easiest wood you can choose from:
| Easiest Wood to Carve |
|---|
| 1. Basswood |
| 2. Aspen |
| 3. Butternut |
| 4. Black Walnut |
| 5. Oak |
Basswood
Basswood is the favorite carving wood of the beginners. It is soft and easier to work with. It is mostly found in the regions of America and Europe. It will not be wrong to say that it doesn’t have any grains and is very smooth, hence ideal for the beginners. It is popularly used for making musical instruments like basses and guitars. You can found it readily in the market and what’s even better? It is very inexpensive!!
Aspen
Aspen is also very popular among the woodcarvers. It is another soft white wood that has fine grains. Although it is stronger than basswood, it is easy to work with. It is easily available in the market and is very cheap.
Butternut
Butternut is a great wood for newcomers. It has a bit coarse grain than the aspen and basswood and is also dark in color. Carving on it is very easy because of its softness.
Black Walnut
Though it is a soft wood but is more expensive than all the above mentioned wood. It is carved best using extra sharp tools. Moreover, it has deep brown color and coarse grains. It is often used for furniture and hardwood objects.
Oak
Oak is a popular wood used for carving. Its wonderful characteristics make it ideal for making hard wood objects and furniture. It has more defined grains and is a bit hard. For its hardness, it is not recommended for the beginners.
Apart from these, there are other woods that can be used for carving. The selection of wood also depends upon the tools you’re using. For instance, you can use hard woods if you have power tools but in the absence of electric tools, you have to use soft wood only.
How To Protect and Seal Wood Carving?
As we already discussed in the above section, you need to apply some sort of finishing product on the final wood carving. The purpose of using finishings is to protect the object from dirt, decay and debris and make it durable. It also makes the object look glossy.
You can either use oils, waxes or finishing sprays such as polyurethane to finish to seal your wood carving.
Wood Carving Projects
Wood carving can be a bit overwhelming at the beginning, the reason being you don’t know from where to start. The point is, it doesn’t even matter! You just need to focus on one thing i.e to get started.
To help you with it, here we have narrowed down some of the easiest wood carving projects for the beginners ;
10 Best wood carving projects for beginners
1. Flute
And as you may already know, most of the musical instruments are made from wood. So why not begin with a flute? Don’t worry if it doesn’t turn out to be amazing, give it a try and who knows you’ll perfect it in your second attempt.
It is very simple to make, all you need to do is to pick a suitable wood preferably basswood and start carving your first ever instrument.
2. Wooden Keychain
Who doesn’t want Keychains? You can carve some funky keychains using your creativity. You don’t need any special tools or supplies, a simple toolset will work. Either keep it yourself or gift your handmade art to someone special.
3. Kitchen Utensils
Wooden spoons and spatula comes very handy while cooking. Have you considered making them on your own?
You can carve a spoon, forks, bowls and even plates. These are fun and easy projects that don’t need much time to complete. You can use these wooden utensils yourself or use it as a gift to your loved ones.
4. Animal Figures
Majority of beginners start their carving journey by making little animal statues. You can do that too!
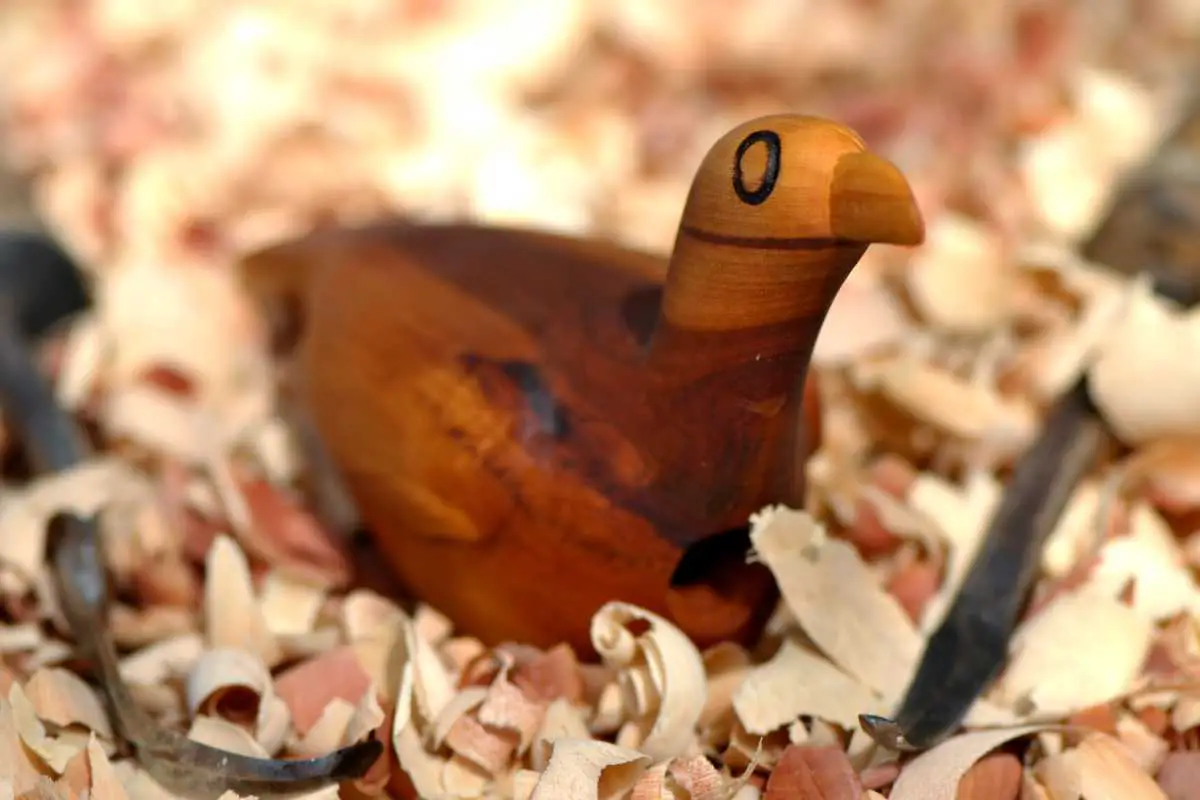
Try making cats, cows, dogs and snails. Your kids will totally love these adorable toys.
Always begin with the simple figures at first and then move on to complex ones. You can show some creativity by coloring these figures and decorating them.
5. Letters
The easiest thing you can do is to carve the letters of your name. You can use these letters to decorate your walls or make a DIY nameplate. Color these letters and fix them to a decorated plyboard to make a cute name plate.
6. Ornaments
Once you get comfortable with the basic projects, you can move further towards the detailed objects. Wooden ornaments and jewelry pieces are the great ideas. You will not only improve your carving skills but will also be able to impress your female friends. You can also make other ornaments like Christmas tree decorations.
7. Chess Board
Love playing chess? Then this idea will surely excite you.
Chess is a complicated game, but making a personalized chessboard is not! With a little practice, you can easily make a chessboard and add your own personal touches to it. You can easily make your king, queen and pawns.
Apart from chessboard, you can also make wooden peg puzzles for your kids and other such wooden games.
8. Wooden Home Decors
If none of the above mentioned ideas excite you, then try creating some amazing home decors using your creativity.
We all want to decorate our homes, but let’s face it, decors are quite expensive. You can save a lot by creating a number of unique articles on your own. Wooden decors look very aesthetically-pleasing too.
Some great decor ideas include wooden frames, wall hanging, Buddha statue, mini trunks, jewellery boxes etc.
9. Coasters
Coasters are very useful and unnecessarily expensive. Save some money by making them at home. They are very simple and easy to make. You can show your creativity by painting them with bright colors. You can even add a personal touch to them by carving your initials.
10. Aesthetic Designs
You can create detailed patterns on the basswood wood and use them to add some elegance in your place. By working on these projects, you will be able to learn different techniques and fine detailing. You can try making tribal and geometric patterns on a board of softwood. Paint the finished art and hang it on the wall!
Other project ideas
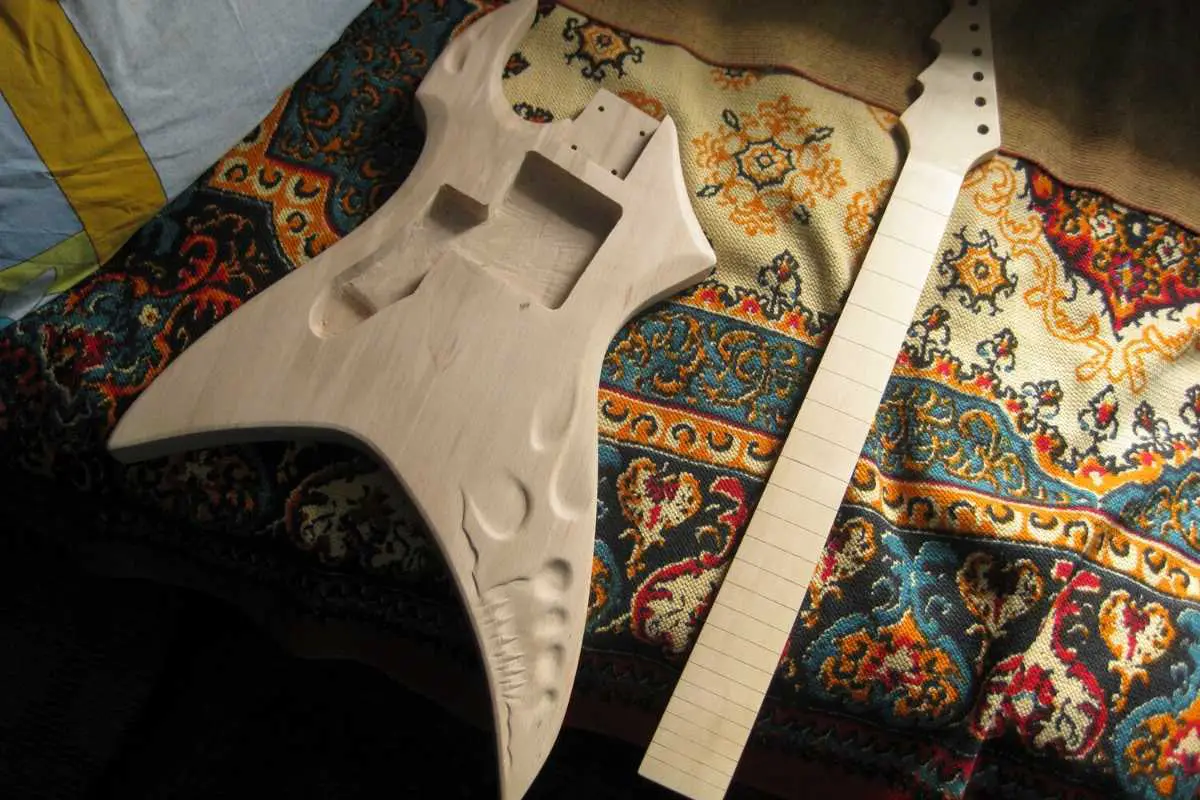
Once you get comfortable in these basic projects, you can move towards the more detailed objects like fine sculptures, statues and even pieces of furniture.
For that you will need dedicated lower tools as well. So, try them once you get some experience.
Finishing Up
Wood carving is one of the most beautiful and oldest forms of art. It has its roots in the ancient times. Since then it has been the favorite hobby of the woodworkers and the carver. But, you don’t have to be an expert to carve on wood. Anyone can start wood carving by working on a few skills and a lot of practice.
We have discussed comprehensively everything related to wood carving, the tools and the techniques required to begin. So what are you waiting for? Gather your supplies, pick any project and start working on your first carving project!