For many designers, makers, and hobbyists, getting a new laser cutter is the pathway to starting a new leather goods business.
But if you’re unfamiliar with laser technology, you might not be sure whether a laser engraver is the right tool for the job. Can you even laser engrave leather in the first place?
Here’s the short answer…
Yes, you can absolutely laser engrave leather! In fact, leather is becoming one of the most popular materials to work with, especially if you own a CO2 laser engraver.
With the right type of leather and engraver settings, which we’ll discuss below, you can engrave or cut precise designs and intricate patterns for a wide range of leather items and accessories.
Let’s dive in.
Laser Engraving Leather: The Basics
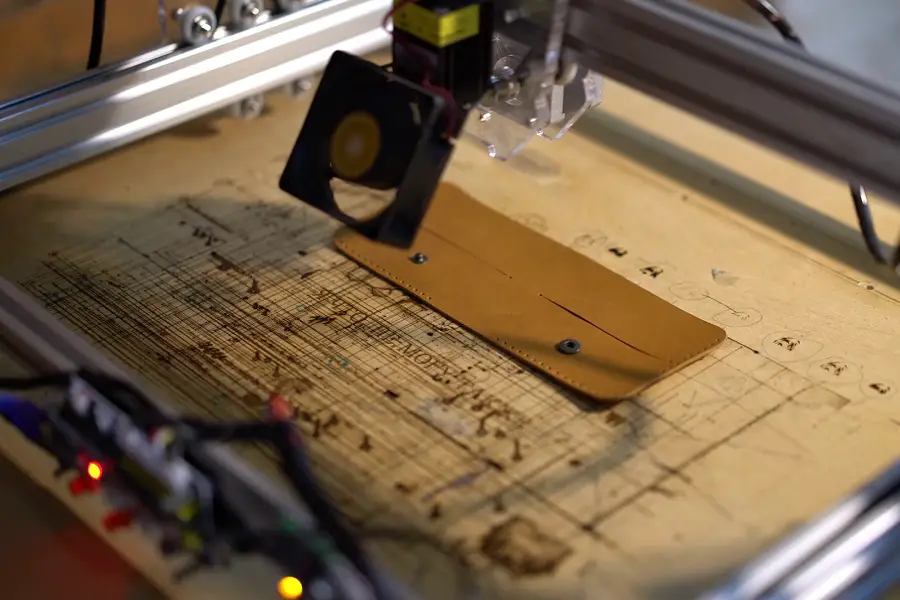
As you know, laser engraving is a process that uses a laser beam to etch, engrave or cut an image or text into the surface of a material. And leather is a suitable material for this process because the laser can burn or vaporize the surface of the leather away from the cutting path to create a permanent (and repeatable) design.
The laser can be set to different power levels (watts) to achieve different levels of depth and darkness in the engraving, and the resulting design, pattern, or text will be clean and precise.
It’s important to note that the laser engraving process can generate heat and may cause the leather to discolor or become slightly scorched. It’s also important to select a leather type that is suitable for laser engraving, as some leathers may be too thick or too soft to produce good results.
Note: If you work with “faux” or synthetic leather, be aware that the fumes can be hazardous. And it’s recommended to check with the product manufacturer to ensure that these materials do not contain Polyvinyl Chloride (PVC), which can potentially be harmful to both you and your laser engraving machine.
Related: Learn more about safety issues with laser engraving and vinyl.
Which Type of Leather is Best for Laser Engraving?
Before you start cutting designs into raw or processed leather, it’s important to consider what kind of leather you would like to use for your laser engraving project.
Not all types of leather are created equal. Some will be inherently thicker and denser than others depending on the quality, style, and makeup of the leather itself.
Different types of leather will typically require different laser intensity and depth settings.
For example, cowhide is a thicker kind of leather, and will require a higher laser power (wattage), and a slower movement speed to achieve effective engraving.
On the other hand, lambskin is a much lighter and thinner type of leather that will not require as high of a laser power setting, in comparison to thicker leather materials.
There are four primary classes of leather (and I recommend experimenting with different types depending on the goals of your laser design project):
- Full-grain leather – Full-grain leather is the highest quality leather, made from the top layer of the animal hide and hasn’t been sanded, buffed or otherwise altered to remove any imperfections.
- Top grain leather – Top grain leather is also made from the top layer of the animal hide, but it has been sanded and buffed to remove imperfections and create a smooth, even surface. It is also thinner and more pliable than full-grain leather, and it is typically more uniform in color and texture (making it a good material for laser engraving projects).
- Corrected grain (bottom/cut split leather) – Also known as “genuine leather”, this is a natural material made from animal hides that have been tanned and treated to make them suitable for use in a variety of products, including clothing, accessories and furniture.
- Bonded leather – Also known as reconstituted leather, this is the lowest quality leather, made up of leftovers of the hide.
Another important factor to consider when choosing the ideal type of leather for your laser engraving project is the color of the leather itself.
Different colors will absorb and react to the laser and the emitted light, and as a result, will require different settings and produce different results.
For example, black leather absorbs a significant amount of light, which makes it easier to engrave than other colors. Different shades of white will reflect a lot more light and therefore will inherently be more difficult to engrave effectively.
Note: Many makers find that the best type of leather is vegetable-tanned leather. This type of leather is tanned using natural tannins from things like tree bark, leaves, or other plants.
I’ve found that it has better durability and resistance to fading or discoloration, plus it’s relatively easy to cut and engrave with and gives off minimal smoke. Although the smell can be a little much at first. But still better than chemically treated leather.
Best Types of Laser Machines for Leather Cutting and Engraving
The other important factor to consider is the type of laser machine that you will be using for your leather engraving projects.
There are a number of different types of laser machines currently on the market. Some will be more effective or more practical for certain applications, and should be considered for their relative advantages and disadvantages.
The most common, and arguably the best type of lasers to use for leather engraving purposes are carbon dioxide (CO2) lasers.
Leather is much thicker than a number of other materials that are typically used for laser engraving, and as a result machines that can produce enough power to achieve the intended result are necessary.
CO2 lasers typically have a power output potential of 40 watts or more, which is around the recommended power necessary for leather engraving. Depending on whether you wish to achieve a surface engraving, or a deeper engraving into the leather, you will need to adjust your laser’s power setting accordingly.
Diode lasers are known for being a lot less powerful than carbon dioxide lasers, and will often not be able to produce the necessary wattage to properly engrave or cut leather products. However, you may be able to etch out designs and create markings on leather goods with a diode laser.
Still, while CO2 lasers are typically more expensive than diode lasers, they are definitely preferred for most leather engraving projects.
Some of the more popular CO2 models for leather engraving include the Glowforge, Omtech, the Thunder Laser Mini, and Atomstack S10.
If CO2 models are out of your budget, you may still be able to use a high-quality diode-type machine that will work with certain types of leather. In that case, recommend checking out this list of the best budget-friendly laser cutters for less than $500.
What about Fiber Laser Cutters?
Finally, although fiber lasers are known for their high speed and efficiency, and are often used for large-scale or high-volume cutting and engraving projects (especially with metal), they are not the best choice when working with leather.
First, fiber laser cutters are much more expensive than standard CO2 engravers and out of the budget range for most home-based makers.
Plus, certain organic materials such as wood, leather, and textiles tend to be transparent to the cutting wavelength of a fiber machine, causing the laser to pass right through the material and mark the table surface instead.
Cut, Etch, Engrave or Mark: What’s the Difference?
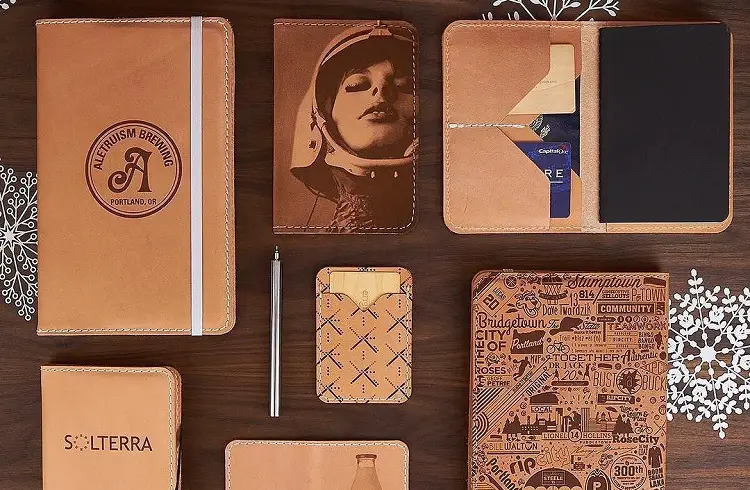
When using a laser engraver, you can really get creative. You can manipulate, style, mark, brand and cut your leather in different patterns, designs, images, text, and so on.
Creating these designs involves either cutting, etching, engraving, or marking the material.
But what’s the difference?
When working with leather, this is important to understand, so here are the basics:
Cutting is the process of using the laser to completely cut through the leather, resulting in a clean edge and separation of the material. We’re talking belts, keychains, cut-out text designs, articles of clothing, and more.
Etching involves using the laser to remove the top layer of the leather, creating a shallow indentation or design on the surface. This technique is popular for etching text and designs into leather wallets, belts, earrings, ornaments, guitar straps, etc.
Marking is similar to etching, but the laser only penetrates the surface of the leather slightly, resulting in a faint mark or design. This world well for things like ornaments, coasters, and wallets, especially when you’re transposing an image or logo onto the material.
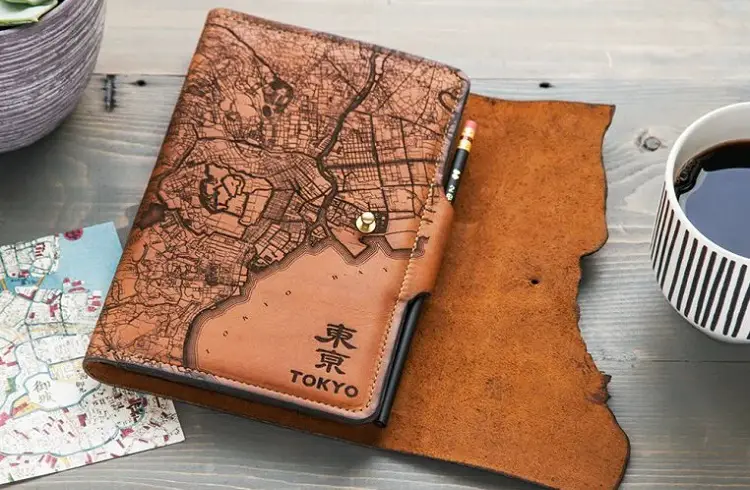
Engraving involves using the laser to cut deeper into the material, creating a more pronounced indentation or design. This is practical with thicker materials and basically carving out your design into patches, straps, horse saddles, belts, bags, leather-bound books, shoes, and more.
Get Started on Your First Laser Leather Engraving Project
If you’re ready to start cranking out some leather designs with your laser cutter, there are a few simple steps to keep in mind.
While this is by no means an in-depth guide on how to use a laser engraver properly, and every project will require different settings and careful attention to detail depending on the intricacy of the design, thickness and surface of the material, and so on, here’s a quick refresher in the important aspects of the process.
1. Decide On Your Desired Product/Idea
The first step is to come to a decision concerning the details of your laser engraving project.
Consider what exactly you would like to engrave, and consider the type of leather material that you plan to be engraving, as there are a variety of different options. As noted above, different types of leather are suited for different lasers, power outputs, engraving speeds, etc.
Once you have decided on the specifics of your leather engraving project, you can now take this information and move on to the next step!
2. Design Your Image Or Text
The next step is to design the image or text that you would like to have laser engraved on your piece(s) of leather. The designs that laser engraver machines use to complete their projects are created on computer design programs.
It is important to remember to make sure that the specific laser design software that you end up using is compatible with the model of laser engraver that you are using, which can be found in the user manual.
There are a number of different programs available, and you should look into their capabilities and accepted file formats (i.e. SVG, DXF, DWG, etc.) before choosing.
Typically, you will be safest using one of the more well-known software that is often compatible with most laser engravers like Adobe Illustrator, Inskscape, Sketchup, or CorelDRAW.
3. Choose Your Engraver’s Settings

Most decent-quality laser engravers will have the technology built in to allow users to control and adjust different parameters like engraving speed, resolution (dots per inch) and laser power.
Depending on the model that you are using, you will be able to adjust a variety of settings and add even more personalization to your projects.
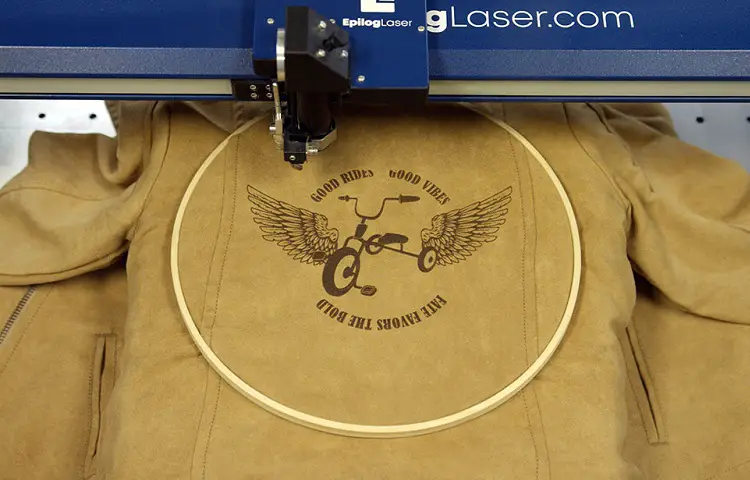
4. Engrave Your Leather
Once everything is set and ready to go, the next step is to place your leather material on the engraving table and turn on your machine and let it work its magic! It never hurts to supervise the process just to make sure there are no vital mistakes being made that you could potentially put a stop to.
With that being said, it is very important to be standing at a safe distance and wearing the proper safety gear while the machine is running.
Also, after engraving, you may want to seal the leather to preserve the design.
5. Inspect Your Finished Product
Once the machine has finished the engraving process, take your leather out and examine the work!
Take a look at the quality and sharpness of the lines, as well as the clarity. If you are satisfied, remember the combination of settings you used for that project and reuse it next time!
If you are not happy with the final result, adjusting your laser engraver’s settings or trying a different design software may help produce better results.